
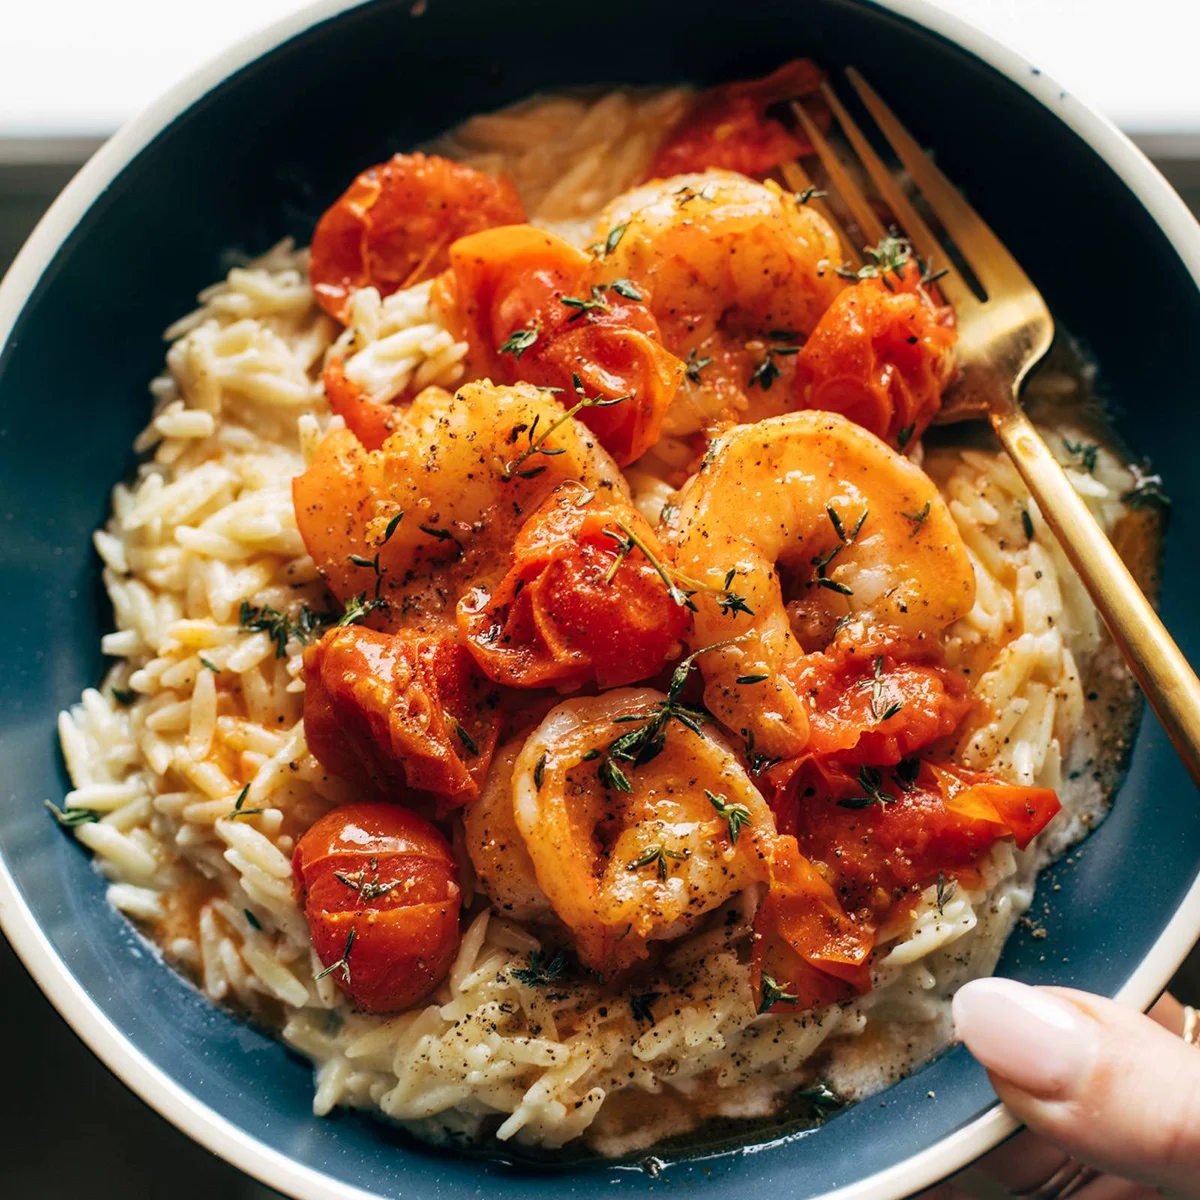
Shrimp laced with buttery garlic and thyme and a burst tomato sauce served on a creamy Parmesan orzo.
Juicy, succulent shrimp laced with garlic, butter, and thyme, tucked into a silky burst tomato sauce, and piled high on creamy, luscious Parmesan orzo. WHAT A DREAMBOAT DINNER. I love this recipe!
In This Post:
How To Make This Garlic Shrimp and Tomatoes (with Pictures)
Step 1: Blister and Smash the Tomatoes
Get the tomatoes hot and blistery; then give ’em a gentle smash with the back of a spoon or a small plate. It’s… very fun.
Step 2: Cook the Shrimp
Make a little clearing right in the center of the tomatoes where you can add your shrimp to cook for a couple of minutes. Salt it up!
Step 3: Get the Garlic and Butter Going In There
Throw in a bunch of freshly sliced garlic and a knob of butter. Stir it up a few times until it’s dreamy.
Step 4: Make a Creamy Orzo
Put a lid on the shrimp and make a quick creamy orzo – butter, Parmesan, cream, lemon, and salt.
Step 5: Put It All Together
Piping hot orzo goes on the plate first, and then we pull our shrimp and tomatoes back out to pile on top.
Lindsay’s Notes
This recipe is in heavy rotation at the moment – and it never fails to make me feel like I’m eating at a fancy restaurant and/or generally have my life together. Is my laundry all over my table? Yes. Have I been using dry shampoo for the last 4 days? Yes. But am I also eating a kind of fancy and beautiful dinner? YES! Three cheers for doable “fancy” recipes. 10/10 recommend.
Creamy orzo with the twang of Parmesan, sweet burst tomatoes gently bubbled into a sauce, and a pile of jumbo, delicate, buttery, garlic-laced shrimp. Pass me a glass of wine and I am living my best life.
As far as family approval goes, Bjork and I love the whole big, beautiful thing – no thyme for him (a true crime and I don’t want to spend any more time talking about it), and lots of thyme, salt, and pepp for me. The girls are hit and miss with the shrimp and tomatoes, but you better believe they love the creamy Parmesan orzo which is, of course, just mac and cheese in disguise. They’ll usually eat a few of the fresh little tomatoes on the side, too. Winning for everybody!
Description
Shrimp laced with buttery garlic and thyme and a burst tomato sauce served on a creamy Parmesan orzo.
Garlic Shrimp and Tomatoes:
Creamy Orzo:
- Cook the Orzo: Cook according to package directions. Drain, toss with a bit of oil, and set aside.
- Soften the Tomatoes: Add the tomatoes and olive oil to a pan over medium high heat so they can soften and get a bit blistered on the outside. I usually cover the pan to avoid extra splatters.
- Smash the Tomatoes: Once they’re soft (5 minutes or so), give them a gentle smash with the back of a spoon or applying even pressure with a plate or similar flat object. You want the tomatoes to be partially burst / smashed so they release some juices.
- Cook the Shrimp: Make a little clearing in the center of the tomatoes and add your shrimp right in; season them with 1/2 teaspoon salt and cook for 2 minutes on each side.
- Give it Some Flava-Flave: Add the garlic, butter, and 1/2 teaspoon salt to the pan and stir to mix it all together. Let it get saucy and bubbly; then remove from heat and cover with a lid.
- Make the orzo: Mix the orzo with butter, half and half, Parmesan, and lemon. Stir to combine; warm it up over the heat if necessary.
- Pile it up: Serve immediately so the orzo doesn’t get too starchy and sticky! Pile it on a plate with a big scoop of steamy shrimp and tomatoes. Top with thyme. So good!
Notes
This amount usually makes enough for just Bjork and I to finish the shrimp, with plenty of orzo for us and the girls. If you wanted to serve 4 adults, I would use 2 pounds of shrimp!
- Prep Time: 10 minutes
- Cook Time: 40 minutes
- Category: Dinner
- Method: Saute
- Cuisine: American
Keywords: shrimp and orzo, orzo recipe, shrimp and tomatoes
Recipe Card powered byFrequently Asked Questions For Garlic Shrimp and Tomatoes
What can I use instead of shrimp?Chicken would be delicious! I would probably pan-fry the chicken first, then take it out and set aside while you build your tomato sauce, then add the chicken back in at the end.
How long do the leftovers last?You can definitely eat this meal as leftovers for 1, maybe 2 days after you make it, but it’s one of those meals that really shines when it’s made fresh.
Can you make this vegetarian / meatless?Use zucchini in place of the shrimp! Or, similarly, this recipe is great.
How do you make this gluten-free and/or dairy-free?Use gluten free orzo, dairy-free butter (or olive oil), and something else creamy in place of the half and half and Parmesan – a knob of dairy-free cream cheese would be good!
Another option would be to skip the creamy orzo and serve this with quinoa or another gluten-free, dairy-free option.
My Favorite Shrimp Recipes
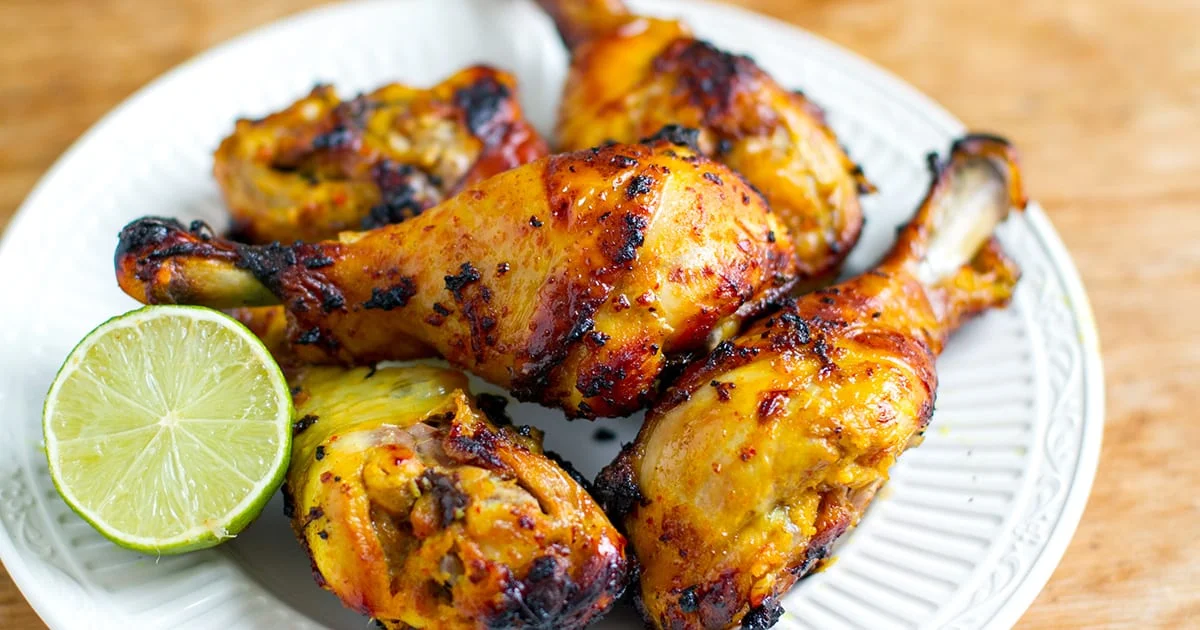
Thai Chicken Drumsticks (Baked)
Flavourful, tender on the inside and crispy on the outside, these Thai chicken drumsticks are baked in the oven for a healthy, protein-rich dinner main.
Thai Chicken Drumsticks
This chicken drumstick recipe is originally from my paleo reset but as it’s no longer a paid program, I am slowly bringing all those recipes on to my blog for everyone to enjoy!
What I love about this recipe is that it’s budget-friendly (assuming you have a few Asian sauces in the pantry already) and it’s ridiculously easy to make. The Thai marinade for the chicken is tangy, sweet and salty, really showcasing that perfect Southeast Asian flavour balance.
The only thing to remember is that these chicken drumsticks are best left to marinate for at least 12 hours. If in a rush, you can leave them in the marinade for an hour but the meat will be more flavourful and more tender, the longer you let it infuse.
This chicken drumstick recipe is gluten-free, low-carb, and Paleo-friendly.
Thai Marinade For Chicken
The marinade used in this recipe is the star of the dish. I mean, I baked chicken drumsticks but it could be wings, tenderloins, breasts or any other part of the bird.
The marinade features ginger, garlic, lime juice and zest, Tamari (or soy sauce), fish sauce, honey and sesame oil, plus a little chili. I LOVE all of these ingredients so I almost always have them on hand and think they are worth purchasing as can will continue to use them.
For example, the fish sauce can be used in my crying tiger beef and rice noodle salad, and ginger and garlic in my Asian chicken salad. Sesame oil and Tamari can then be used to make my Teriyaki baked salmon.
How To Make Baked Chicken Drumsticks
Step 1. Mix the marinade in a bowl, then toss the chicken drumsticks in it.
Step 2. Marinate the chicken overnight or for about 12 hours (24 is even better).
Step 3. Remove chicken from the refrigerator and let it come to room temperature before cooking, so about 15 minutes prior.

Step 4. Preheat the oven to 190 C/ 375 F, make sure it’s hot! Grease a flat baking tray with some oil and place the drumsticks on top. Bake for 30 minutes. Use the leftover marinade to baste the chicken halfway through.
What To Serve With Thai Chicken Drumsticks
As these chicken drumsticks are made with a Thai marinade, the most suitable side dishes would be Asian ones, or at least Asian-inspired.
Rice and noodles are the obvious choices, or you can try my coconut cauliflower rice or egg-fried cauli rice for a low-carb version. Stir-fried vegetables or even something as simple as steamed or boiled broccoli with garlic would go well. I often make my go-to side salad but with more of an Asian dressing or you can try my Asian shredded Napa cabbage salad.
If you don’t want rice or noodles, you can make roast some sweet potatoes. Try my baked sweet potatoes with miso butter or kimchi sweet potato fries.
Full Recipe
Find the full list of ingredients, instructions, and a nutritional breakdown below. If you have questions or cook this recipe, please let me know in the comments, and make sure to rate this recipe so it’s easy for others to find.
Description
Flavourful, tender on the inside and crispy on the outside, these Thai chicken drumsticks are baked in the oven for a healthy, protein-rich dinner main. This chicken drumstick recipe is gluten-free, low-carb, and Paleo-friendly.
- Combine the marinade ingredients in a large bowl.
- Add the drumsticks and coat well using your hands. Transfer the chicken and the marinade to a ziplock bag or a container and store overnight in the fridge. Give them a shake once or twice to spread the marinade around.
- Take out of the fridge 10-15 minutes before cooking. Preheat the oven to 190 C/ 375 F.
- Grease an oven tray with a little coconut oil or olive oil. Place the drumsticks evenly on a tray and pop in the oven, middle shelf, for 25-30 minutes. Reserve the marinade, and halfway through cooking, brush some over the drumsticks.
- In the meantime, prepare the rice/noodles, veggies or a salad of choice.
Notes
- Chicken: You can use any part of the chicken for this recipe: thighs, chicken wings, diced breast and so on. Turkey legs can also be used. You can pan-fry chicken thighs or breasts instead of baking them.
- Marinating time: Ideally, you would want to marinate these for at least 12-24 hours before roasting. If that is not possible, give them at least half an hour to soak in the flavours.
- Make-ahead: This is a great recipe to make a larger batch of marinated drumsticks to store in the freezer.
Nutrition
- Serving Size: 2 drumsticks
- Calories: 404
- Sugar: 5 g
- Sodium: 1555.9 mg
- Fat: 17.9 g
- Carbohydrates: 7.5 g
- Fiber: 0.5 g
- Protein: 51.7 g
- Cholesterol: 231.4 mg
Keywords: Chicken Drumsticks, Thai Marinade, Thai Chicken, Baked Chicken Drumsticks, Chicken Drumstick Recipe
More Thai-Inspired Recipes
Join the Conversation (0)
Nutrition Facts
Amount per serving
- Calories N/A
- Total Fat N/A
- Saturated Fat N/A
- Cholesterol N/A
- Sodium N/A
- Total Carbohydrates N/A
- Protein N/A
Hi, I'm Alex!
I love sharing easy, healthy, and family-friendly recipes that anyone can make at home.

Be the first to comment on this recipe!