
The tender meat-like texture of this black bean burger is packed with incredible flavor. Black beans are blended in a mixture of veggies, flavorful herbs, and panko breadcrumbs to create an amazing meatless burger that will impress anyone!
Meat lovers and vegetarians alike will jump at the chance to enjoy the black bean burger! Add some sides to this, and then you will have a meal to remember! I love corn on the cobb, this yummy salad, and some refreshing lemonade!
What Is a Black Bean Burger?
Did you know that a black bean burger doesn’t just have black beans in it? It’s a patty that’s MADE of black beans! This healthy black bean patty is so insanely delicious that you will forget that you are even eating a meatless, vegetarian burger! It’s a great way to eat a little bit healthier and add some extra protein to your meal. Plus… It’s easy to make!
I am all for a classic hamburger or even a smash burger, but even if you love those, this burger will inspire you to eat healthier on a regular basis! Because this is so easy to whip together, it’s a great alternative to have at any BBQ for all of your friends who may not eat meat. It tastes so good with a little sauce added (In-n-Out Spread is my favorite!). Then, once you load up all of the condiments you will see why everyone loves this!
Black Bean Burger Ingredients
I love that black beans are already a staple in my pantry! I have them all the time, and this is a fantastic recipe to use for them! Check out the recipe card at the bottom of the post for exact measurements, and then you will be set!
- Black Beans: Canned black beans are the base of this recipe.
- Olive Oil: Oil helps sauté and soften the vegetables.
- Green Bell Pepper: This adds great texture to the black bean patty.
- White Onion: Onion is a wonderful added flavor to this burger.
- Jalapeños: If you want to add a little kick to your burger, then don’t skip out on these!
- Cilantro: Fresh cilantro is my favorite herb to add to a black bean burger.
- Tomato Paste: This helps bind all the ingredients together and hold their shape.
- Garlic Powder: Garlic is a great flavor to season this burger
- Salt: I like to use salt to enhance the flavor of the burger.
- Cumin: I love using cumin to flavor and season the black beans.
- Flour: A little bit of flour will help hold the burger ingredients together.
- Panko Breadcrumbs: I prefer the crunchy texture of panko breadcrumbs over regular breadcrumbs.
Making Black Bean Burgers
I love how easy these burgers come together in the food processor. I always make black bean burgers for a fast and flavorful meal to feed my family! Because they are so delicious, I’m sure that your family will request them a LOT!
- Prepare Black Beans: Lay the drained black beans on a paper towel to dry.
- Heat Skillet: Heat a medium-sized skillet or grill over medium-high heat.
- Sauté Vegetables: Add olive oil, bell pepper, onion, and jalapeño to the skillet. Then, cook for 5 minutes to soften the vegetables.
- Combine Ingredients: Add the cooked vegetables to a food processor along with the black beans, cilantro, tomato paste, garlic powder, salt, and cumin.
- Mix: Pulse the food processor to mix and combine the ingredients. Leave the mixture slightly chunky.
- Stir in Flour and Panko: Add it to a bowl, and then stir in the flour and Panko breadcrumbs.
- Form Patties: Scoop out a ⅓ cup of the mixture and then form it into a patty.
- Cook Patties: Cook the patties on a skillet or a grill and then cook for 5-7 minutes on each side. Patties will be crispy on the outside and warmed through the middle.
- Assemble: Serve warm on a hamburger bun with your favorite burger toppings. Then you can serve these and watch everyone gobble them up!
Topping Ideas
Here are some topping ideas that would be delicious for this black bean burger recipe! I love having a lot of toppings for my guests to choose from. Building your own burgers is a great way to make everyone happy!
- Leafy Greens: Romaine, iceberg, spinach, arugula, or even sprouts. My absolute favorite is butter lettuce!
- Vegetables: Tomatoes, red onion, sautéed onions, pickles, sliced bell peppers, sliced cucumbers…the list goes on.
- Fruit: I had to highlight fruit because avocado is considered a fruit! Pineapple rings would also be amazing!
- Condiments and Sauces: I’m a sauce girl! Mayo, mustard, ketchup, barbecue sauce, teriyaki, a burger sauce, whatever sounds good!
- Cheeses: Adding sliced cheese would be delicious on top of your patty! Cheddar, provolone, and pepper jack are our favorite!
- Spice it Up: Try adding pickled jalapeños, red pepper flakes, or banana peppers to your burger. I love adding heat!
Storing Leftovers
These burgers make the best leftovers! I love them for dinner, but the leftovers are also nice to have on hand for lunches throughout the week!
- In the Refrigerator: Place extra patties in an air-tight container and then store them in the refrigerator. They will last for up to 5 days.
- In the Freezer: Put the black bean burger patties between parchment paper and place them in a sealable plastic bag. Thaw in the refrigerator before cooking or cook from frozen. They will last in the freezer for up to 2 months.
- To Reheat: Simply reheat the black bean burger in the microwave for 1-2 minutes or until warmed through. Or, if you want to try it, my favorite way to reheat black bean burgers (or any leftovers!) is in the air fryer! Simply place the chilled or frozen burger in the air fryer at 375 degrees Fahrenheit and then cook for 3 minutes on each side or until warmed through.
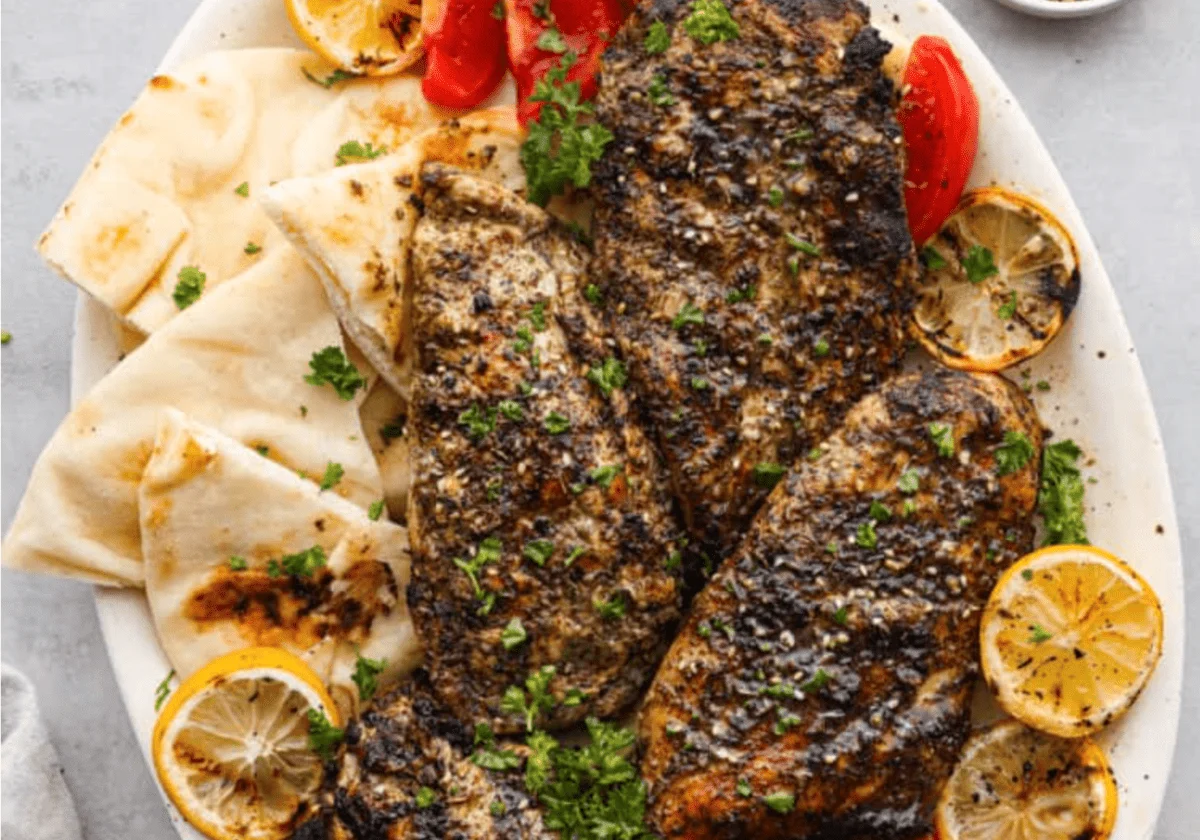
A burger doesn’t always have to be a beef burger. There are so many other incredible burger options that are healthier and SO delicious. Try these burger recipes, I promise you won’t miss the beef! Seasoned with a traditional Middle Eastern Za’atar spice blend and grilled, this Za’atar chicken is juicy and packed with unique flavors. In just 20 minutes you’ll have a flavorful and filling dinner that no one will forget! If you have never heard of Za’atar seasoning, you are not alone! I just heard of it recently, and now I’m hooked! It’s a great savory blend of warm and earthy seasonings that will really wow your taste buds. You can also make the spice at home! If you like homemade spices, you’ll have to try this Homemade Fajita Seasoning, this better than store bought Italian Seasoning, and this Taco Seasoning too! So at this point you may be wondering what is Za’atar seasoning? It is a blend of savory, nutty, and earthy spices that usually includes oregano, thyme, marjoram, and sumac. There are different blends of Za’atar seasoning based on where you are eating it. Kind of like curry the ingredients can change based on the area it’s made in. I have a link to the Za’atar seasoning blend in the recipe box below too if you want to make it, or you can pick it up from the store. Grilled Za’atar Chicken is quickly marinated in the Za’atar seasoning and olive oil and grilled to perfection. I really think you are going to love this dish! It’s an easy 20 minute dinner that would go great with some pita bread and hummus. I also love with baba ganoush which goes great with this Za’atar seasoning. You can actually sprinkle some on top and the flavor is incredible. I think this will be a new family favorite! These simple ingredients combine to make the most delicious and moist chicken. This Za’atar chicken is so unique, and amazingly flavorful! If you are looking for a great easy dinner, then this is the recipe for you! See the recipe card below for exact measurements. This recipe is so easy! I love how quickly it comes together and it really is so delicious. I ate it with some tomatoes and pita bread and it was perfection. Some of my kids added salt and pepper, but I thought it was perfect the way it was. You can make it however you like, and I know you are going to love it! Here are a few simple ways to make yourself the master of the grill! Once your friends and family get a bite of your grilled Za’atar chicken, they’ll be hooked. It’s hard not to be when they’re so juicy and flavorful. Who doesn’t wan’t grilled Za’atar chicken for leftovers? This recipe makes enough to serve eight people, so if you need to save your leftovers here is how. In the Refrigerator: Store your cooled chicken in an airtight container in the fridge for up to 4 days. I love a simple chicken dinner! But sometimes chicken can taste boring when you are always making it the same way. Here are some recipes that will give you great ideas to keep your chicken tasting unique and juicy!More Healthy Burger Recipes
Za’atar Chicken
Grilled Za’atar Chicken
Ingredients
Za’atar Chicken Recipe

Tips for Grilling Chicken
Storing Leftovers
More Chicken Recipes
Join the Conversation (0)
Nutrition Facts
Amount per serving
- Calories N/A
- Total Fat N/A
- Saturated Fat N/A
- Cholesterol N/A
- Sodium N/A
- Total Carbohydrates N/A
- Protein N/A
Hi, I'm Alex!
I love sharing easy, healthy, and family-friendly recipes that anyone can make at home.

Be the first to comment on this recipe!