

These Sweet Chili Salmon Bites pan-fried and glazed in caramelised, sweet and salty sticky sauce will quickly become your favourite salmon recipe. I make this dish on a weekly basis and the family loves it!
Glazed Sweet Chili Salmon Bites Recipe
In this recipe, salmon bites or fillets are pan-fried until pink and flaky, then coated in a sticky, sweet chilli, soy and garlic glaze sauce.
Everyone in my family loves this salmon recipe so much that I cook it weekly.
Plus, it’s quick and easy and only needs a handful of accessible ingredients. You can have the whole meal on the table in under 20 minutes. A winning dinner in my book!
What To Serve With Glazed Salmon Bites
I have a couple of go-to dishes to serve with salmon bites.
We almost always have it with Basmati rice (or sometimes cauliflower rice) and then either a side of stir-fried green vegetables like Chinese broccoli, bok choy and broccoli OR with an Asian-style slaw salad.
You can serve sweet chilli salmon with white or brown rice, cauliflower rice, quinoa, rice noodles, any other noodles or even with a side of sweet potato.
For a stir-fry, I usually cook a bunch of cut-up veggies over medium-high heat for a few minutes and then a few splashes of soy sauce or Tamari and maybe a little lemon juice. I keep these simple because the glazed salmon packs a lot of bold flavours.
For the slaw salad, I shred red or Wombok/Napa cabbage, carrots, red bell peppers, red onion and coriander and toss through with a dressing made of lime juice, fish sauce, brown sugar or honey, sesame oil and some olive oil. You can also use store-bought Asian dressing to save time.
What You Will Need
Salmon – I use about 1.1-1.2 lb or 500 grams of salmon fillets for about 4 servings. I like to buy fish fillets without skin as it works better for this particular salmon bites recipe. It’s easier to cut and flip, plus some of my family members don’t eat the skin so I don’t bother.
Having said that, I have also made this glazed sweet chilli salmon dish with long fillets rather than bite-size pieces and with the skin on. In this case, I pan-fry it on the skin side first until it’s nice and crispy.
Money-saving tip: I often buy frozen salmon fillets and defrost them for a few hours before cooking or in the fridge overnight. Salmon tails or steaks are often cheaper and will work just as well with this sticky sweet chilli sauce.
Sauces – I like to use a Thai-style sweet chili sauce like the Ayam brand and premium light soy sauce. I have made the dish with regular soy sauce but it’s a little more full-on and saltier, I prefer a more subtle taste of the light soy sauce in this recipe. Garlic is optional, sometimes I add it in and if I can’t be bothered I only use those two sauces.
Dietary Swaps – You can use sugar-free sweet chilli sauce and coconut aminos or Tamari instead of regular soy sauce.
How To Make Sweet Chili Salmon Bites
Pro-Tip: I like making this dish as salmon bites rather than long fillets because it cooks the fish faster and more evenly. You know how the salmon fillets will often have thinner ends and thicker middle, which always seems to be undercooked, so you have to throw the fillets back in the pan and then the thinner bits end up overcooked and dry. Yep, that’s annoying!
Another reason I like to cook salmon as bite-size pieces is because you get every bite coated in that delicious caramelised glaze.
Step 1. The first thing to do is to cut our salmon into square or rectangular pieces, about 1-1.5 inches long/thick. Sprinkle very lightly with salt and set aside.
Step 2. Heat a couple of tablespoons of olive oil in a large frying pan over medium-high heat. Once hot, add the salmon bites and cook for 1 minute over medium-high heat. Then turn the heat down to medium-low and cover the frying pan with a lid. Cook for 3 more minutes. Using a lid speeds up the cooking time significantly!
Step 3. Remove the lid and after about 20-30 seconds, turn the salmon pieces over and cook for 1.5-2 more minutes on the other side without a lid. Thinner pieces can be taken out earlier as won’t need as much cooking.
Step 4. Remove pre-cooked salmon bites to a bowl and scrape off any stuck, browned flesh bits from the bottom of the pan. Save those bits as they are delicious and crispy.
Step 5. Now it’s time to make our caramelised salmon glaze sauce! You can use the same frying pan but I like to switch to a slightly smaller pan for this step.
Add another tablespoon of oil and place over medium heat. Add the garlic and cook for 1 minute, stirring a few times, until it starts to get golden brown.
Step 6. Now add 1/3 cup of sweet chili sauce and 2 tablespoons of light soy sauce.
Stir through and increase the heat to high. Cook for 1 minute and about 20-30 seconds, stirring frequently until the sauce starts to bubble and thicken.
Step 7. Once it looks caramelised and semi-sticky, return the salmon pieces and stir through the sauce. Leave in the pan over heat for about 30 seconds to bubble away gently. Remove from heat and sprinkle with green onions to finish the dish.
Tips For Making Side Dishes
I like to cook the rice a little bit ahead of time and have my vegetables pre-cut so I can stir-fry them while the salmon is cooking.
If I make a salad, I also do it either a little ahead of salmon or while it’s cooking. In general, I like to cook in parallell but it can be stressful for some so you can prepare the sides earlier.
Nutrition Notes
For me, salmon is the perfect superfood! It’s high in protein and healthy fats, especially Omega-3s, plenty of minerals and fat-soluble vitamins, and it’s delicious.
Per serving: 307 calories, 28.4 grams of protein, 20.6 g of carbohydrates, and 13.1 g of fat.
Per serving with 2/3 cup of cooked white rice: 489 calories, 31.7 g protein, 60.5 grams carbohydrates and 13.4 grams fat.
More Salmon Recipes
Full Recipe & Ingredients
Find the full list of ingredients, instructions and extra cooking notes below. If you have questions or cook this recipe, please let me know in the comments and make sure to rate this recipe so it’s easy for others to find.
Description
Learn how to make delicious glazed salmon bites. You can cook salmon fillets whole or cut them up into bite-size pieces, which allows you to cook the fish much quicker and more evenly, plus every piece is coated in the delicious, sticky, sweet chili and soy glaze sauce.
For sweet chili soy glaze sauce
Recommended Sides
- I like making this dish as salmon bites rather than fillets because it cooks the fish faster and more evenly.
- You know how the salmon fillets will often have thinner ends and thicker middle, which always seems to be undercooked, so you have to throw the fillets back in the pan and then the ends end up overcooked and dry. Yep, that’s annoying!
- Another reason I like to cook salmon as bite-size pieces is because you get more of the fish surface coated in that delicious caramelised sweet chili and soy glaze.
- So, the first thing to do is to cut our salmon into square or rectangular pieces, about 1-1.5 inches long/thick. Sprinkle very lightly with salt and set aside.
- Heat a couple of tablespoons of olive oil in a large frying pan over medium-high heat. Once hot, add the salmon bites and cook for 1 minute over medium-high heat. Then turn the heat down to medium-low and cover the frying pan with a lid. Cook for 3 more minutes. Using a lid speeds up the cooking time significantly!
- Remove the lid and after about 20-30 seconds, turn the salmon pieces over and cook for 2 more minutes on the other side without a lid.
- Remove pre-cooked salmon bites to a bowl and scrape off any stuck, browned flesh bits from the bottom of the pan. Save those bits as they are delicious and crispy.
- The next time is to make our caramelised sweet chili sauce. You can use the same frying pan but I like to switch to a slightly smaller pan for this step.
- Add another tablespoon of oil and place over medium heat. Add the garlic and cook for 1 minute, stirring a few times, until it starts to get golden brown.
- Now add 1/3 cup of sweet chili sauce and 2 tablespoons of light soy sauce. Stir through and increase the heat to high. Cook for 1 minute and about 20 seconds, stirring frequently until the sauce starts to bubble and thicken.
- Once it looks caramelised and semi-sticky, return the salmon pieces and stir through the sauce. Leave in the pan over heat for about 30 seconds to bubble away gently. Remove from heat and sprinkle with green onions to finish the dish.
Notes
- I like to cook the rice a little bit ahead of time and have my vegetables pre-cut so I can stir-fry them while the salmon is cooking. If I make a salad, I also do it either a little ahead of salmon or while it’s cooking. In general, I like to cook in parallel but it can be stressful for some so you can prepare the sides earlier.
Nutrition
- Serving Size: 4-5 salmon bites sauce
- Calories: 307
- Sugar: 9 g
- Sodium: 755.4 mg
- Fat: 13.1 g
- Carbohydrates: 20.6 g
- Fiber: 0.1 g
- Protein: 28.4 g
- Cholesterol: 87.6 mg
Keywords: Salmon Recipes, Salmon fillets, Asian, Thai, Sweet Chilli, Dinner Ideas
Garlic Shrimp and Tomatoes with Parmesan Orzo Recipe
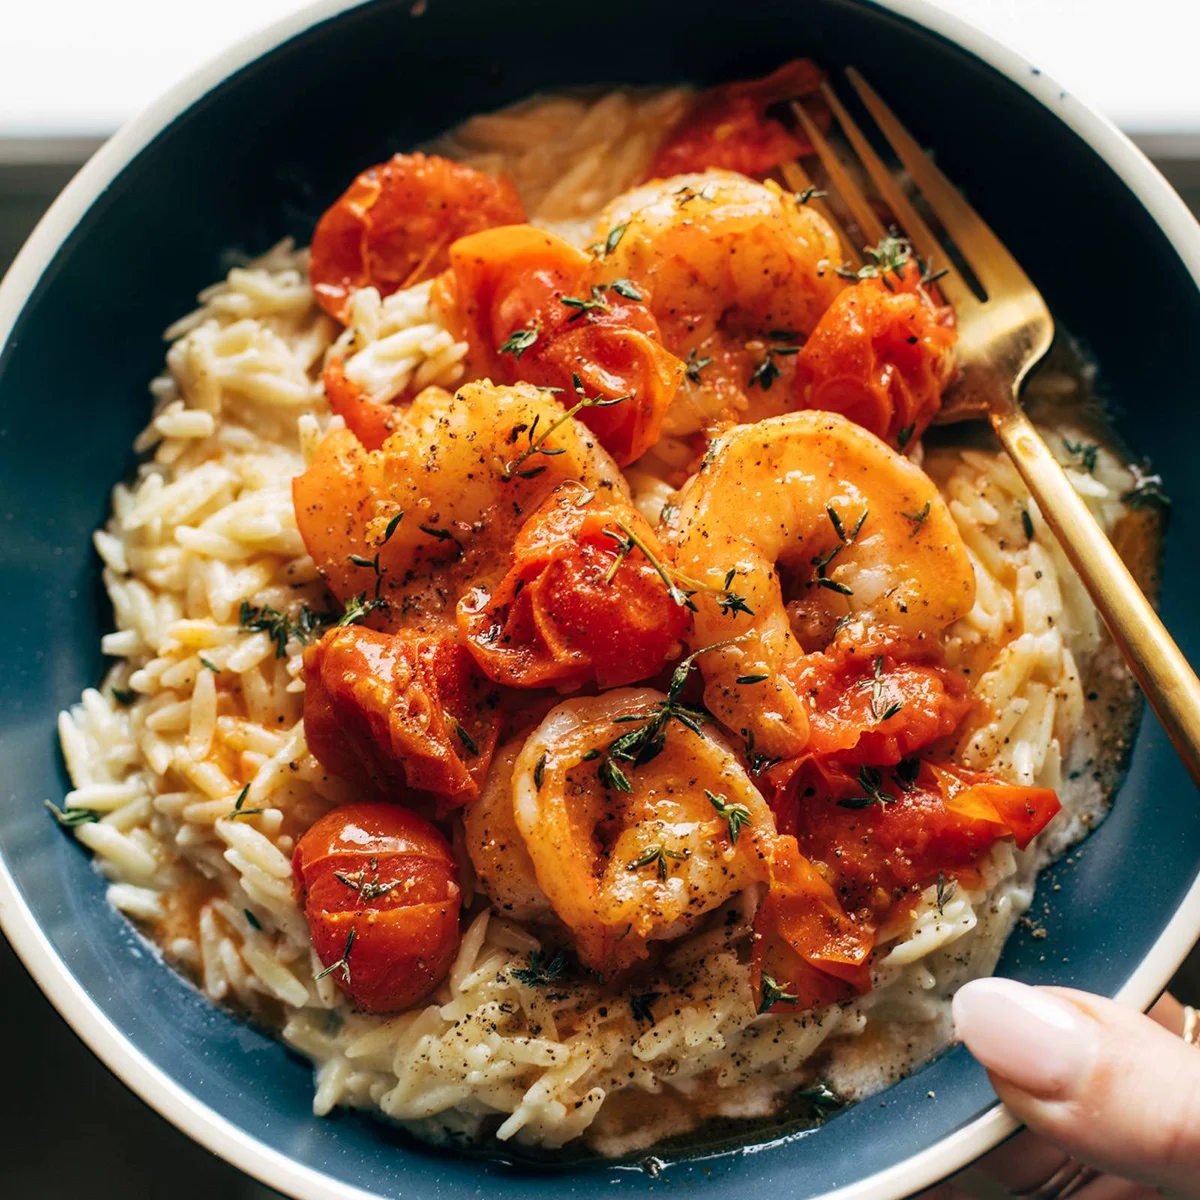
Shrimp laced with buttery garlic and thyme and a burst tomato sauce served on a creamy Parmesan orzo.
Juicy, succulent shrimp laced with garlic, butter, and thyme, tucked into a silky burst tomato sauce, and piled high on creamy, luscious Parmesan orzo. WHAT A DREAMBOAT DINNER. I love this recipe!
In This Post:
How To Make This Garlic Shrimp and Tomatoes (with Pictures)
Step 1: Blister and Smash the Tomatoes
Get the tomatoes hot and blistery; then give ’em a gentle smash with the back of a spoon or a small plate. It’s… very fun.
Step 2: Cook the Shrimp
Make a little clearing right in the center of the tomatoes where you can add your shrimp to cook for a couple of minutes. Salt it up!
Step 3: Get the Garlic and Butter Going In There
Throw in a bunch of freshly sliced garlic and a knob of butter. Stir it up a few times until it’s dreamy.
Step 4: Make a Creamy Orzo
Put a lid on the shrimp and make a quick creamy orzo – butter, Parmesan, cream, lemon, and salt.
Step 5: Put It All Together
Piping hot orzo goes on the plate first, and then we pull our shrimp and tomatoes back out to pile on top.
Lindsay’s Notes
This recipe is in heavy rotation at the moment – and it never fails to make me feel like I’m eating at a fancy restaurant and/or generally have my life together. Is my laundry all over my table? Yes. Have I been using dry shampoo for the last 4 days? Yes. But am I also eating a kind of fancy and beautiful dinner? YES! Three cheers for doable “fancy” recipes. 10/10 recommend.
Creamy orzo with the twang of Parmesan, sweet burst tomatoes gently bubbled into a sauce, and a pile of jumbo, delicate, buttery, garlic-laced shrimp. Pass me a glass of wine and I am living my best life.
As far as family approval goes, Bjork and I love the whole big, beautiful thing – no thyme for him (a true crime and I don’t want to spend any more time talking about it), and lots of thyme, salt, and pepp for me. The girls are hit and miss with the shrimp and tomatoes, but you better believe they love the creamy Parmesan orzo which is, of course, just mac and cheese in disguise. They’ll usually eat a few of the fresh little tomatoes on the side, too. Winning for everybody!
Description
Shrimp laced with buttery garlic and thyme and a burst tomato sauce served on a creamy Parmesan orzo.
Garlic Shrimp and Tomatoes:
Creamy Orzo:
- Cook the Orzo: Cook according to package directions. Drain, toss with a bit of oil, and set aside.
- Soften the Tomatoes: Add the tomatoes and olive oil to a pan over medium high heat so they can soften and get a bit blistered on the outside. I usually cover the pan to avoid extra splatters.
- Smash the Tomatoes: Once they’re soft (5 minutes or so), give them a gentle smash with the back of a spoon or applying even pressure with a plate or similar flat object. You want the tomatoes to be partially burst / smashed so they release some juices.
- Cook the Shrimp: Make a little clearing in the center of the tomatoes and add your shrimp right in; season them with 1/2 teaspoon salt and cook for 2 minutes on each side.
- Give it Some Flava-Flave: Add the garlic, butter, and 1/2 teaspoon salt to the pan and stir to mix it all together. Let it get saucy and bubbly; then remove from heat and cover with a lid.
- Make the orzo: Mix the orzo with butter, half and half, Parmesan, and lemon. Stir to combine; warm it up over the heat if necessary.
- Pile it up: Serve immediately so the orzo doesn’t get too starchy and sticky! Pile it on a plate with a big scoop of steamy shrimp and tomatoes. Top with thyme. So good!
Notes
This amount usually makes enough for just Bjork and I to finish the shrimp, with plenty of orzo for us and the girls. If you wanted to serve 4 adults, I would use 2 pounds of shrimp!
- Prep Time: 10 minutes
- Cook Time: 40 minutes
- Category: Dinner
- Method: Saute
- Cuisine: American
Keywords: shrimp and orzo, orzo recipe, shrimp and tomatoes
Recipe Card powered byFrequently Asked Questions For Garlic Shrimp and Tomatoes
What can I use instead of shrimp?Chicken would be delicious! I would probably pan-fry the chicken first, then take it out and set aside while you build your tomato sauce, then add the chicken back in at the end.
How long do the leftovers last?You can definitely eat this meal as leftovers for 1, maybe 2 days after you make it, but it’s one of those meals that really shines when it’s made fresh.
Can you make this vegetarian / meatless?Use zucchini in place of the shrimp! Or, similarly, this recipe is great.
How do you make this gluten-free and/or dairy-free?Use gluten free orzo, dairy-free butter (or olive oil), and something else creamy in place of the half and half and Parmesan – a knob of dairy-free cream cheese would be good!
Another option would be to skip the creamy orzo and serve this with quinoa or another gluten-free, dairy-free option.
My Favorite Shrimp Recipes
Join the Conversation (0)
Nutrition Facts
Amount per serving
- Calories N/A
- Total Fat N/A
- Saturated Fat N/A
- Cholesterol N/A
- Sodium N/A
- Total Carbohydrates N/A
- Protein N/A
Hi, I'm Alex!
I love sharing easy, healthy, and family-friendly recipes that anyone can make at home.

Be the first to comment on this recipe!