
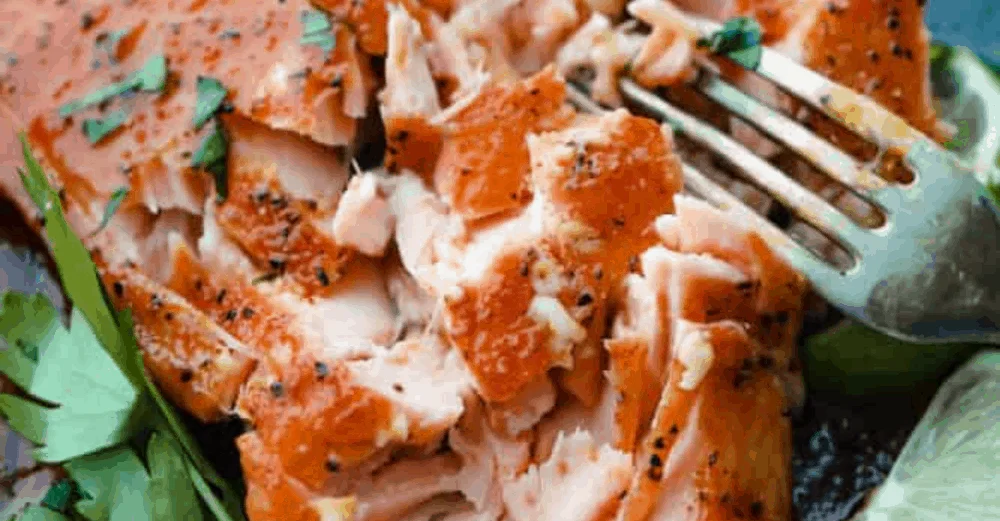
Smoky, woodsy flavors meet summery honey and lime in this melt-in-your-mouth salmon recipe! You are not going to be able to get enough of this irresistible Cedar Plank Honey Lime Salmon!
There is nothing better than a tender, grilled cut of fish bursting with flavor. For all of my seafood lovers out there, you have got to try mahi mahi, salmon, and the best shrimp that will turn your dinner table into a Michelin coastal restaurant.
Delicious Cedar Plank Salmon Recipe
Once you have tried cooking your salmon over cedar planks, you won’t want to go back. This cooking method with Native American and Scandinavian roots uses a cedar plank soaked in water to gently grill meat and seafood while also infusing it with a smoky, earthy flavor. Since you are cooking with indirect heat, you get a perfectly smoked outside while retaining a moist and flaky center. This is such an easy technique to use but has been mind-blowing with how amazing the salmon turns out!
Cooking time is only 20 minutes which puts more time back into your day! All you have to do is whip up my super easy 3-ingredient lemon honey glaze for a pop of tangy flavor and you are ready to go! Another great thing about this recipe is that you can serve your fish straight from the cedar plank which means fewer dishes to wash. The presentation of juicy salmon coming straight from the grill to the table isn’t half bad, either. This simple and sophisticated way of cooking salmon will give you perfect results and a perfect flavor, every time.
Cedar Plank Honey Lime Salmon Ingredients
My advice is to start with the perfect cut of fish, and then add a few fresh ingredients to enhance its flavor.
- Cedar Plank: You have to make sure your cedar plank is food-grade, so avoid picking one up from a hardware store.
- Salmon: You will need 2 pounds. I like to use wild-caught salmon because it packs more body-loving nutrients and fewer fats than farmed salmon.
- Olive Oil: For adding moisture. Helps to achieve a perfectly crispy outer layer.
- Brown Sugar: Adds sweetness.
- Salt and Pepper: To taste, for salmon rub.
- Paprika: For a bright kick.
- Butter: To thicken the glaze and add flavor. I like using salted butter for this recipe.
- Lime Juice: You will need the juice of half a lime. Fresh works best!
- Honey: For sweetness and to give the glaze its perfect stick.
How to Grill Salmon on a Cedar Plank
Don’t let that top-notch flavor fool you, this salmon comes together in just a few quick and easy steps!
- Soak Your Cedar Plank: Prepare your cedar plank by soaking it in water for 30 minutes to 2 hours. Lay salmon on top of the cedar plank.
- Mix Dry Rub: In a small bowl combine brown sugar, salt, pepper, and paprika. Rub the salmon with olive oil and then with the seasonings.
- Place Plank in Grill: Set the grill to medium-high heat and place the plank in indirect heat. Cover the grill and let the salmon cook for 15-20 minutes or until it reaches an internal temperature of 135 degrees. If you are cooking in direct heat, check the plank often and spritz with water if the plank catches fire. Remove the salmon from the grill.
- Making the Honey Lime Sauce: In a small saucepan add the butter over medium-high heat. Let the butter melt until it starts to foam and turn slightly brown. Remove from the heat and whisk in lime juice and honey. Pour on top of salmon and serve.
Tips For The Best Cedar Plank Salmon
Try these tips and tricks to create the perfect Cedar Plank Salmon!
- Soaking Cedar Planks: For extra flavor, you can soak your plank in wine, cider, or beer. If cooking in indirect heat, you don’t need to worry about the plank catching fire. Always keep a spray bottle full of water next to the grill just in case flames occur. This can happen even when using water if the plank has not been soaked completely.
- Seasonings: The different seasonings you can pair with fish being cooked on a cedar plank are endless. For a lemony twist, use my homemade lemon pepper seasoning to give the perfect dash of citrus to a smoky piece of grilled fish. Other summer favorites are dill and Dijon mustard. You can mix and match other pantry staples like chili powder, cayenne, ginger, garlic, and soy sauce, or keep it simple and just sprinkle on fresh herbs! Customize to create the best seasoning for you!
- Reusing Cedar Planks: I would recommend against reusing cedar planks. Since the woody flavor is infused during the cooking process, reusing planks would cause it to become dry and lack the ability to add the best flavor to your cooking.
- Other Foods to Grill: Don’t stop at seafood- using a cedar plank is also a great way to cook things like chicken, pork, and even vegetables and fruits too! You could throw pineapple slices on your plank for a sweet side that tastes just as good as Brazillian steakhouses!
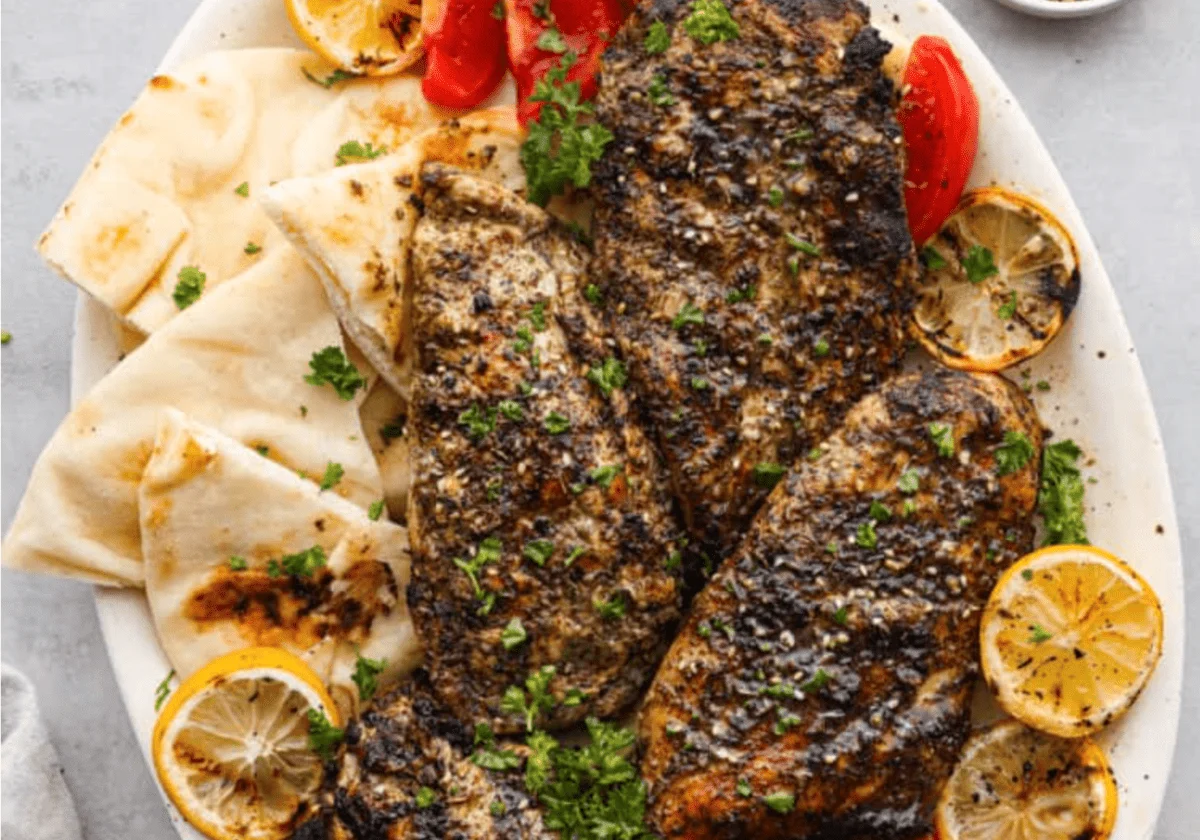
One of my all-time favorite combinations is to serve salmon alongside asparagus. I love the contrast between the tender, flaky salmon and the bite of asparagus. For something more hearty, this salmon also pairs wonderfully with mashed potatoes. And for a cooler side, create a complete summer meal by serving this up with some quick and delicious pasta salad or fruit salad! Being high in healthy fats and low in carbs, salmon is one of my favorite proteins to use in cooking. Here are more delicious salmon recipes that taste AMAZING but won’t break your diet! Seasoned with a traditional Middle Eastern Za’atar spice blend and grilled, this Za’atar chicken is juicy and packed with unique flavors. In just 20 minutes you’ll have a flavorful and filling dinner that no one will forget! If you have never heard of Za’atar seasoning, you are not alone! I just heard of it recently, and now I’m hooked! It’s a great savory blend of warm and earthy seasonings that will really wow your taste buds. You can also make the spice at home! If you like homemade spices, you’ll have to try this Homemade Fajita Seasoning, this better than store bought Italian Seasoning, and this Taco Seasoning too! So at this point you may be wondering what is Za’atar seasoning? It is a blend of savory, nutty, and earthy spices that usually includes oregano, thyme, marjoram, and sumac. There are different blends of Za’atar seasoning based on where you are eating it. Kind of like curry the ingredients can change based on the area it’s made in. I have a link to the Za’atar seasoning blend in the recipe box below too if you want to make it, or you can pick it up from the store. Grilled Za’atar Chicken is quickly marinated in the Za’atar seasoning and olive oil and grilled to perfection. I really think you are going to love this dish! It’s an easy 20 minute dinner that would go great with some pita bread and hummus. I also love with baba ganoush which goes great with this Za’atar seasoning. You can actually sprinkle some on top and the flavor is incredible. I think this will be a new family favorite! These simple ingredients combine to make the most delicious and moist chicken. This Za’atar chicken is so unique, and amazingly flavorful! If you are looking for a great easy dinner, then this is the recipe for you! See the recipe card below for exact measurements. This recipe is so easy! I love how quickly it comes together and it really is so delicious. I ate it with some tomatoes and pita bread and it was perfection. Some of my kids added salt and pepper, but I thought it was perfect the way it was. You can make it however you like, and I know you are going to love it! Here are a few simple ways to make yourself the master of the grill! Once your friends and family get a bite of your grilled Za’atar chicken, they’ll be hooked. It’s hard not to be when they’re so juicy and flavorful. Who doesn’t wan’t grilled Za’atar chicken for leftovers? This recipe makes enough to serve eight people, so if you need to save your leftovers here is how. In the Refrigerator: Store your cooled chicken in an airtight container in the fridge for up to 4 days. I love a simple chicken dinner! But sometimes chicken can taste boring when you are always making it the same way. Here are some recipes that will give you great ideas to keep your chicken tasting unique and juicy!Cedar Plank Honey Lime Salmon Pairings
Storing Your Cedar Plank Salmon
Other Salmon Favorites
Za’atar Chicken
Grilled Za’atar Chicken
Ingredients
Za’atar Chicken Recipe

Tips for Grilling Chicken
Storing Leftovers
More Chicken Recipes
Join the Conversation (0)
Nutrition Facts
Amount per serving
- Calories N/A
- Total Fat N/A
- Saturated Fat N/A
- Cholesterol N/A
- Sodium N/A
- Total Carbohydrates N/A
- Protein N/A
Hi, I'm Alex!
I love sharing easy, healthy, and family-friendly recipes that anyone can make at home.

Be the first to comment on this recipe!