

Saucy, sticky, crispy, sweet and savory Cashew Chicken! Just like your favorite takeout, but made easy at home.
Oh my oh my oh my – saucy, sticky, sweet and savory cashew chicken is here, and it was my favorite recipe I made this month, and this just might be the recipe that will pull you (okay, fine, me) out of the winter slumps with texture, flavor, and a little extra jazziness. It’s just a really fun recipe.
My version of cashew chicken is actually based off of this Cheesecake Factory copycat recipe, which is lovely and reminds me that although haters like to hate, I should probably get back to the Cheesecake Factory for a feast ASAP. Great job, Sabrina.
I made it essentially the same as her cashew chicken recipe, but just a little easier, and with a shorter ingredient list.
And what resulted was glorious. We’re talking about bite-sized pieces of chicken, breaded and fried into a nice little crisp, tossed with a quick, sticky-sweet, soy-and-garlic sauce, all brought together with a handful of cashews. Ideally this would be served over a pile of hot, steaming rice with a side of something of the vegetable variety (steamed or roasted broccoli is a fave). But more practically, you won’t even get that far before you start popping bites of chicken straight out of the hot pan.
There is a 100% chance that anyone who is in a 10-mile radius will come running into your kitchen when they smell the garlic, ginger, and soy in the sauce as it hits the pan. It’s a good moment.
In This Post: Everything You Need For Cashew Chicken
Prefer To Watch Instead Of Read?
Click here to see the step-by-step web story instructions for this recipe!
Ingredients To Make Cashew Chicken
While this is somewhat of a clear-the-counters-and-put-on-your-apron kind of recipe, it doesn’t take as much effort or ingredients as you’d think.
Here’s what you need:
- Chicken
- Dry ingredients (flour, cornstarch, the usual)
- Batter (you’ll make this, but it’s easy! promise!)
- Vegetable oil for frying
- Cashews
- Sauce (soy sauce, hoisin sauce, vinegar, ginger, etc.)
- Green onions to top it off
If you really want to up the sesame flavor, you could even add a swish of toasted sesame oil too!
How To Make Cashew Chicken
First, you’ll have to put a little bit of prep work in – cube your chicken, get the dry ingredients in a bowl and mix the batter for frying, and maybe even whisk together your sauce now if you want to really make this seamless.
Then, you’re going to start making magic happen.
- Coat your chicken in the dry ingredients and get it in the batter to coat.
- Heat your oil in a large skillet to get it ready to fry. (You can test it by adding just a drip of batter to see if it sizzles, but if you want to be really exact, the oil should be about 350-375 degrees.)
- Fry it up! Add half your chicken, then repeat with the other half.
- Remove the oil and put the chicken back in the pan and add your sauce and cashews.
- Serve that tender saucy chicken with rice and veggies (if you want). Way to go!
Deep-Fried Vs. Stir-Fried
Traditionally, there are two ways to make cashew chicken: stir-fried in a pan or wok, or deep-fried, the latter of which is happening here.
I love love love the crispy, delicious, deep-fried bits of chicken and how they cling to the sauce here, but if you want to eliminate the deep-frying of this recipe, that is an option.
What I’d do instead: skip the batter and just stir fry the chicken in a pan, and then add the sauce at the end. Easy.
HOWEVER if you are choosing to deep fry, I have a small tip for you to make it a littttttle easier: toss *all your chicken* together into the flour, then stir up *all the floured chicken* together into the batter. From there, I dump about half of it into the pan of hot oil – it’s going to stick together and feel very wrong, but you can work quickly and use two forks to break the pieces apart. And repeat with the other half batch.
Cashew Chicken: Frequently Asked Questions
Where is cashew chicken from?Cashew chicken is a Chinese-American dish that can be either stir-fried or deep-fried – the latter of which (what we’re making here), originated in Springfield, Missouri. It was created by a chef named David Leong who moved to the US from China and was looking to create a dish that appealed to the tastes of Americans, which is how it was born. Thank you, David!
Can I stir-fry the chicken instead of frying it?Absolutely! As I mentioned above, the other version of this dish is stir-fried instead of deep-fried. Just skip the coating and frying step and stir fry your chicken, then add the sauce.
Yup! I’d maybe skip the batter and deep frying and employ one of the crispy tofu ideas in this post. You can also check out this Sesame Apricot Tofu as an equally delicious alternative!
How does this hold up for leftovers?There’s a little sogginess that happens for leftovers, but I still really enjoyed it. If you want to revive the crispiness, you can heat it in a pan on medium-high heat to get things crisped up again.
Could I add other veggies to this?Absolutely! Green beans, bell peppers, snow peas, whatever suits your fancy.
Can I use chicken thighs instead of chicken breasts?Sure! Though I prefer chicken breasts in this specific recipe (makes it really deliciously tender, and a little less greasy!).
How can I make this cashew chicken healthier?A few ideas: stir-fry the chicken instead of frying it, use brown rice instead of white rice, increase the veggies, and/or serve up that delicious chicken in lettuce cups instead for a fun lettuce wrap vibe!
Description
Saucy, sticky, crispy, sweet and savory Cashew Chicken! Just like your favorite takeout, but made easy at home. Served with steamy rice and broccoli.
Notes
Chicken Shortcut: I find dredging, battering, and frying individual pieces of chicken to be kind of tedious. So I tossed *all my chicken* together into the flour, then stirred up *all the floured chicken* together into the batter. From there, I dumped about half of it into the pan of hot oil – it’s going to stick together and feel very wrong, but you can work quickly and use two forks to break the pieces apart. And repeat with the other half batch. Done!
Type of Pan: Personally I like to use a nonstick for this to avoid the chicken getting stuck to the bottom of the pan.
Caramelization and Stickiness Level: If you like extra browning, caramelization, chewiness, and stickiness, let everything cook in the pan together for more like 5 minutes instead of 1 minute. Personally I like the texture of the sauce at 1 minute, but it does look really pretty with that caramelization.
Leftovers: They get a tad bit soggy but I still really enjoyed them. For best results, brown the chicken in a nonstick skillet for a few minutes to get some browning / crisping on the outside.
- Prep Time: 15 minutes
- Cook Time: 15 minutes
- Category: Dinner
- Method: Fry
- Cuisine: Chinese-Inspired
Keywords: cashew chicken, takeout chicken, takeout at home, sticky chicken, chicken and rice
Recipe Card powered byOther Necessary Takeout-Style Recipes
Time To Show You Off!
Tag @pinchofyum on Instagram for a chance to be featured
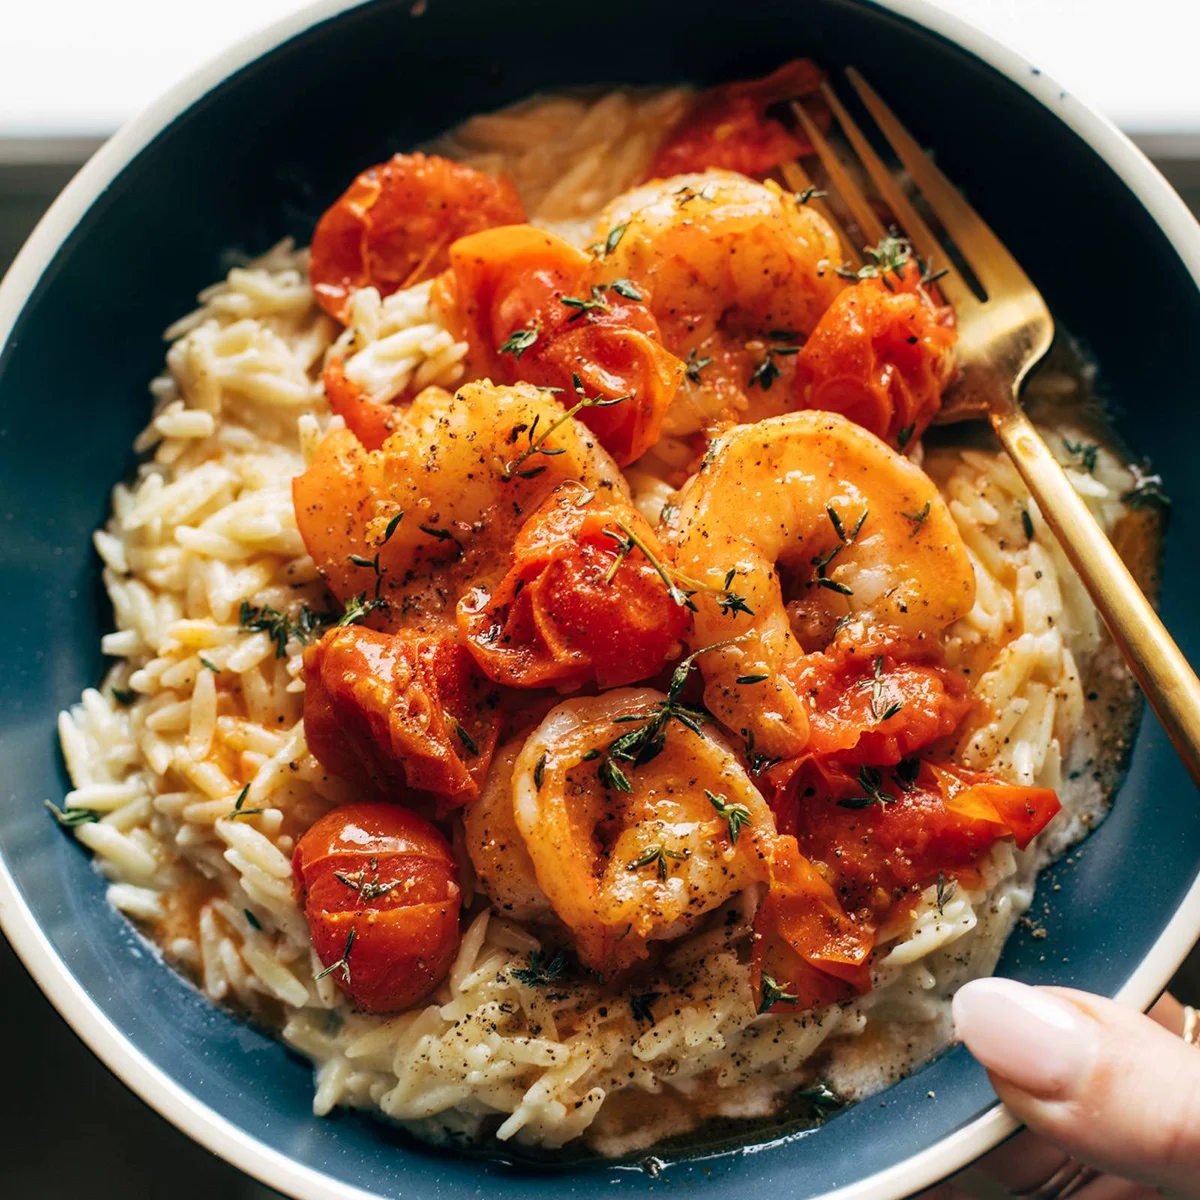
Garlic Shrimp and Tomatoes with Parmesan Orzo Recipe
Shrimp laced with buttery garlic and thyme and a burst tomato sauce served on a creamy Parmesan orzo.
Juicy, succulent shrimp laced with garlic, butter, and thyme, tucked into a silky burst tomato sauce, and piled high on creamy, luscious Parmesan orzo. WHAT A DREAMBOAT DINNER. I love this recipe!
In This Post:
How To Make This Garlic Shrimp and Tomatoes (with Pictures)
Step 1: Blister and Smash the Tomatoes
Get the tomatoes hot and blistery; then give ’em a gentle smash with the back of a spoon or a small plate. It’s… very fun.
Step 2: Cook the Shrimp
Make a little clearing right in the center of the tomatoes where you can add your shrimp to cook for a couple of minutes. Salt it up!
Step 3: Get the Garlic and Butter Going In There
Throw in a bunch of freshly sliced garlic and a knob of butter. Stir it up a few times until it’s dreamy.
Step 4: Make a Creamy Orzo
Put a lid on the shrimp and make a quick creamy orzo – butter, Parmesan, cream, lemon, and salt.
Step 5: Put It All Together
Piping hot orzo goes on the plate first, and then we pull our shrimp and tomatoes back out to pile on top.
Lindsay’s Notes
This recipe is in heavy rotation at the moment – and it never fails to make me feel like I’m eating at a fancy restaurant and/or generally have my life together. Is my laundry all over my table? Yes. Have I been using dry shampoo for the last 4 days? Yes. But am I also eating a kind of fancy and beautiful dinner? YES! Three cheers for doable “fancy” recipes. 10/10 recommend.
Creamy orzo with the twang of Parmesan, sweet burst tomatoes gently bubbled into a sauce, and a pile of jumbo, delicate, buttery, garlic-laced shrimp. Pass me a glass of wine and I am living my best life.
As far as family approval goes, Bjork and I love the whole big, beautiful thing – no thyme for him (a true crime and I don’t want to spend any more time talking about it), and lots of thyme, salt, and pepp for me. The girls are hit and miss with the shrimp and tomatoes, but you better believe they love the creamy Parmesan orzo which is, of course, just mac and cheese in disguise. They’ll usually eat a few of the fresh little tomatoes on the side, too. Winning for everybody!
Description
Shrimp laced with buttery garlic and thyme and a burst tomato sauce served on a creamy Parmesan orzo.
Garlic Shrimp and Tomatoes:
Creamy Orzo:
- Cook the Orzo: Cook according to package directions. Drain, toss with a bit of oil, and set aside.
- Soften the Tomatoes: Add the tomatoes and olive oil to a pan over medium high heat so they can soften and get a bit blistered on the outside. I usually cover the pan to avoid extra splatters.
- Smash the Tomatoes: Once they’re soft (5 minutes or so), give them a gentle smash with the back of a spoon or applying even pressure with a plate or similar flat object. You want the tomatoes to be partially burst / smashed so they release some juices.
- Cook the Shrimp: Make a little clearing in the center of the tomatoes and add your shrimp right in; season them with 1/2 teaspoon salt and cook for 2 minutes on each side.
- Give it Some Flava-Flave: Add the garlic, butter, and 1/2 teaspoon salt to the pan and stir to mix it all together. Let it get saucy and bubbly; then remove from heat and cover with a lid.
- Make the orzo: Mix the orzo with butter, half and half, Parmesan, and lemon. Stir to combine; warm it up over the heat if necessary.
- Pile it up: Serve immediately so the orzo doesn’t get too starchy and sticky! Pile it on a plate with a big scoop of steamy shrimp and tomatoes. Top with thyme. So good!
Notes
This amount usually makes enough for just Bjork and I to finish the shrimp, with plenty of orzo for us and the girls. If you wanted to serve 4 adults, I would use 2 pounds of shrimp!
- Prep Time: 10 minutes
- Cook Time: 40 minutes
- Category: Dinner
- Method: Saute
- Cuisine: American
Keywords: shrimp and orzo, orzo recipe, shrimp and tomatoes
Recipe Card powered byFrequently Asked Questions For Garlic Shrimp and Tomatoes
What can I use instead of shrimp?Chicken would be delicious! I would probably pan-fry the chicken first, then take it out and set aside while you build your tomato sauce, then add the chicken back in at the end.
How long do the leftovers last?You can definitely eat this meal as leftovers for 1, maybe 2 days after you make it, but it’s one of those meals that really shines when it’s made fresh.
Can you make this vegetarian / meatless?Use zucchini in place of the shrimp! Or, similarly, this recipe is great.
How do you make this gluten-free and/or dairy-free?Use gluten free orzo, dairy-free butter (or olive oil), and something else creamy in place of the half and half and Parmesan – a knob of dairy-free cream cheese would be good!
Another option would be to skip the creamy orzo and serve this with quinoa or another gluten-free, dairy-free option.
My Favorite Shrimp Recipes
Join the Conversation (0)
Nutrition Facts
Amount per serving
- Calories N/A
- Total Fat N/A
- Saturated Fat N/A
- Cholesterol N/A
- Sodium N/A
- Total Carbohydrates N/A
- Protein N/A
Hi, I'm Alex!
I love sharing easy, healthy, and family-friendly recipes that anyone can make at home.

Be the first to comment on this recipe!