
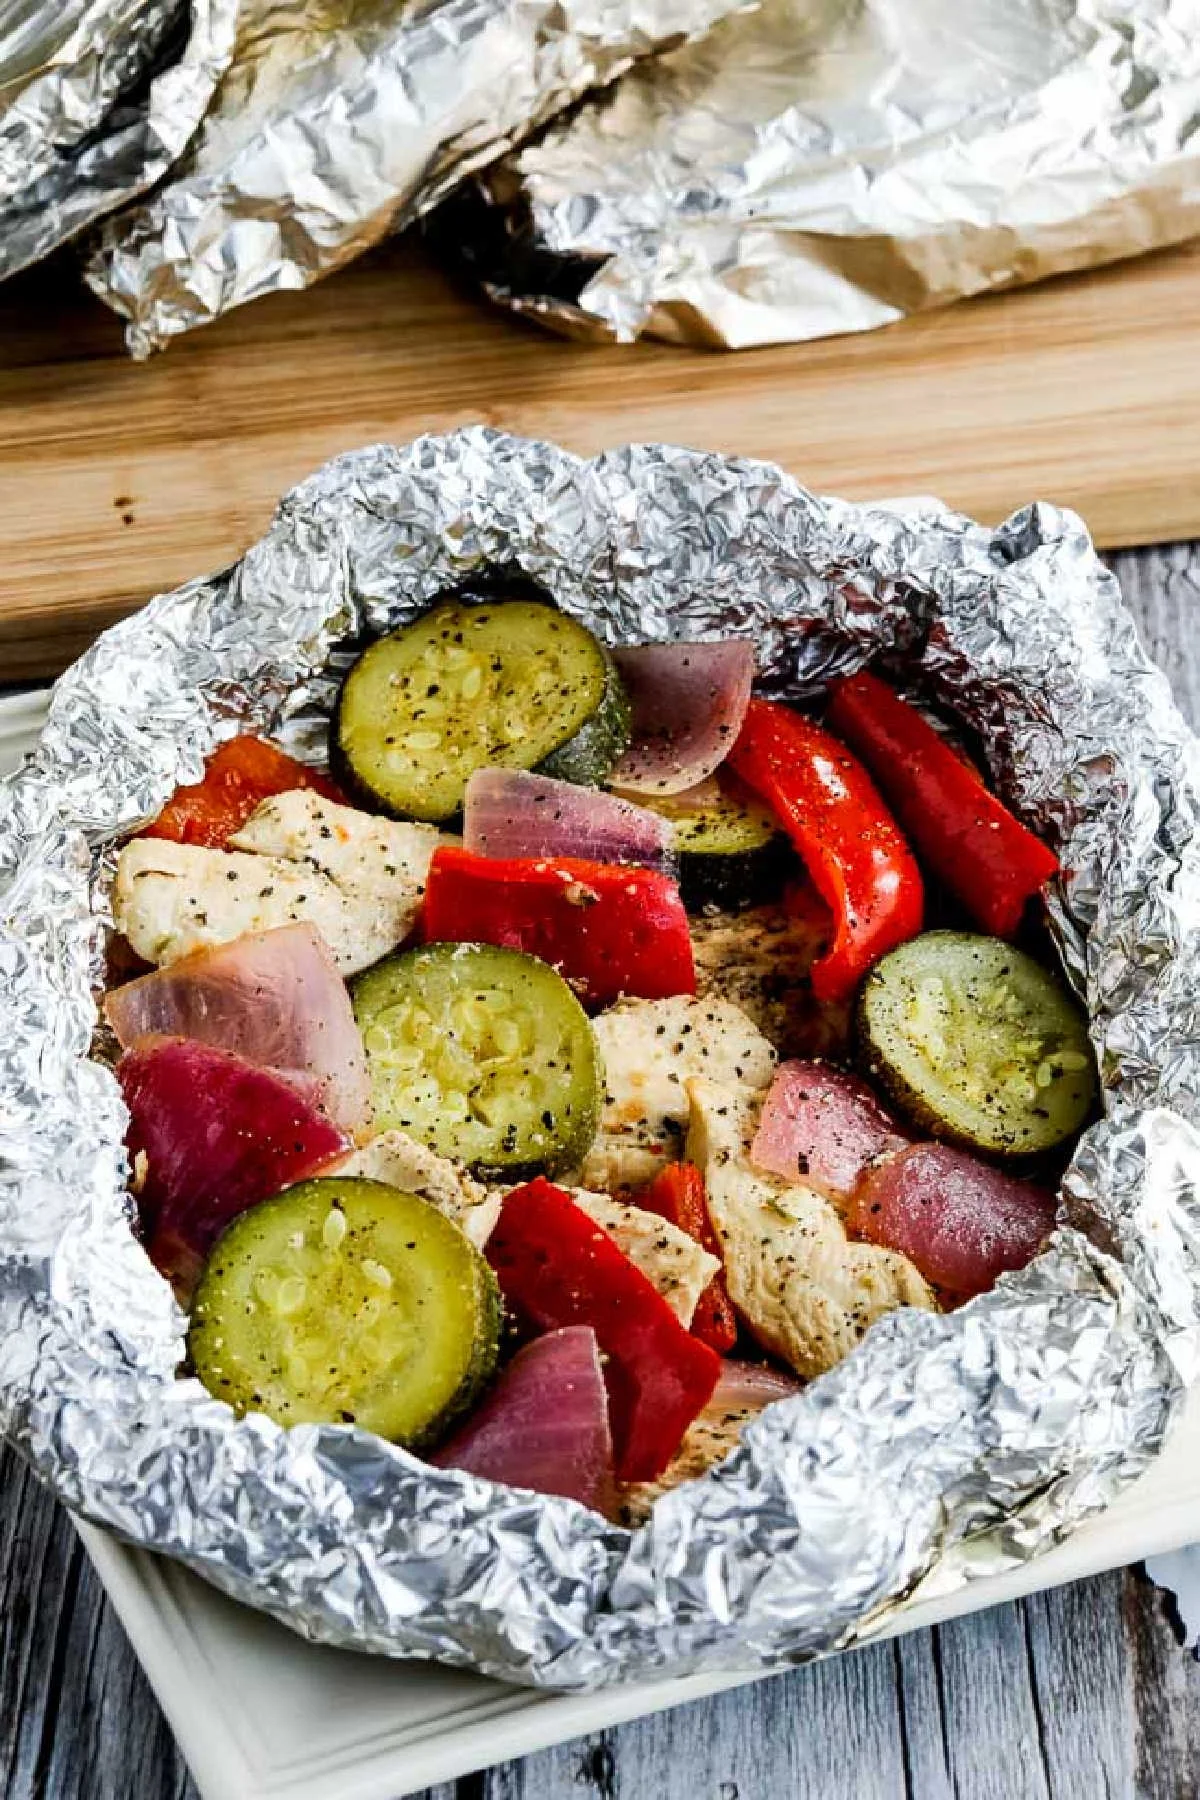
This tasty Low-Carb Foil Packet Dinner is perfect to make on the grill, but you can also cook the foil packets in the oven! And clean-up is a breeze for this tasty dinner. See tips in the post if you prefer not to use foil.
PIN the Foil Packet Dinner to try it later!
There are endless variations on dinners cooked in foil, and when I was a kid we always called these Tin Foil Dinner or Hobo Dinners. And this was something my family always made when we were camping. But that type of dinner almost always had potatoes and carrots, which wouldn’t work for people who were watching their carbs.
So after I started my carb-conscious eating journey I came up with this tasty Low-Carb Foil Packet Dinner. I first made this recipe at a Denny Family Campout, and posted it on my brand new food blog! Then years later I finally realized the recipe had to have some photos before anyone would be tempted to try it!
Foil packet dinners like this are perfect to cook on a gas grill or one of those handy little raised charcoal grills that lots of campsites have, and they can be cooked near the coals of a campfire if you’re extra careful. And dinners wrapped in foil can also be cooked in the oven too if it’s cold outside or you don’t have a grill.
What ingredients do you need?
What if you have family members who won’t eat these veggies?
If you have non low-carb eaters in the family (or picky children who won’t eat red peppers, zucchini, or onions) you could make two separate packets of the veggie mixture and put some potatoes and carrots in one batch for the kids. Cut potatoes and carrots into smaller pieces since they take longer to cook.
How to make the easy marinade used for this recipe:
I don’t have many marinade recipes made of purchased ingredients, but this recipe is a variation of the ultra-easy and popular Completely Foolproof 100% Delicious Grilled Chicken, so if you like this idea you might also want to try that recipe when you’re looking for something easy to grill at home. When you’re using purchased ingredients like this, be sure to check for added sugar and also to be sure they’re gluten-free if that’s needed at your house.
Want a vegetarian foil packet dinner?
If you’re cooking for some people who want a plant-based meal, just leave out the chicken from some of the packets for a tasty vegetarian dinner. You could add a vegetable protein source if you like.
What if you don’t want to use that much foil?
Some people might be willing to make foil dinners when they’re camping but reluctant to use this much foil at home. No problem; just drain the chicken and veggies and cook it in a casserole dish. (I can’t tell you for sure about the timing for that, but I think it would be easy to use my suggestion for cooking the foil packets in the oven and just check a few times while it’s cooking.) You could also cook the ingredients for the foil packet dinner in a Grilling Pan (affiliate link) if you’re careful to drain off the marinade well. The cooking time for that will probably be a bit shorter.
How to Make this Low-Carb Foil Packet Dinner:
(Scroll down for complete printable recipe including nutritional information.)
- Trim chicken breasts as needed, then cut crosswise into pieces about one inch thick.
- Mix Newman’s Own Classic Oil and Vinegar Dressing (affiliate link), Zesty Italian Dressing Mix (affiliate link), Spike Seasoning (affiliate link)) if using, and a little salt and fresh-ground black pepper to make the marinade.
- Put chicken in a Ziploc bag and add a little more than half the dressing mixture. Let the chicken marinate in the fridge or a cooler all day.
- A few hours before you want to cook, cut up the zucchini, red bell pepper, and red onion and put the veggies into a Ziploc bag.
- Pour in the rest of the marinade and let veggies marinate for 1-2 hours.
- When you’re ready to assemble the foil dinners, drain the chicken and vegetables. (If you’re camping you can just snip the corner of the Ziploc bag and let most of the liquid drain out. They don’t have to be completely drained, although it makes it easier to assemble the packets if the chicken and vegetables aren’t too wet.)
- You need a grill that’s preheated to medium high, or a campfire or raised charcoal grill in a campground that has burned down to just coals.
- To assemble the packets tear 8 large pieces of foil. (We had heavy-duty foil that was 18 inches wide and our pieces of foil turned out to be a little bigger than we absolutely needed.)
- Lay out the foil to make four packets with two pieces of foil for each.
- Put one-fourth of the chicken in the middle of each foil stack; then put one-fourth the veggie mixture on top of the chicken.
- Fold over the foil, making a series of small folds at the top and at the ends to seal the edges together. Then turn that packet over and fold over the second piece of foil, sealing the ends well again. (This recipe has a good photo of how to fold the packets together.)
- For a home grill or a charcoal campground grill (where the packets are cooking on a grate) cook the packets about 10 minutes with the chicken side down on the grill; then turn and cook about 10 minutes more on the second side. I wish I knew a good way to tell when they’re done without opening one, but that’s really the only way!
- To cook near the hot coals of a fire, it’s extra important to have heavy-duty foil. I wouldn’t recommend putting packets directly on the coals, put them around the edge of the fire. I’m guessing cooking time will be slightly shorter for cooking near coals, but it will depend on how hot your coals are. I’d rotate the packets (so the opposite side is near the coals) every 5 minutes and then check one of the packets after 15 minutes to see if they need to cook a bit longer.
- To cook in the oven, preheat temperature to 450F/230C and cook 30-35 minutes.
- Serve hot in the packets (or not) with some fresh-ground pepper added at serving time.
- You can also add some coarsely grated Parmesan cheese if you want to take it up a notch; enjoy!
Make the Foil Pack Dinner into a Camping Meal:
When I’m camping I’d serve this with “camping salad”. Place cut up cucumbers, black olives and cherry tomatoes in a Ziploc bag. Pour your favorite salad dressing over (ranch or blue cheese is good). Serve right out of the bag for no clean up.
More Dinners Cooked in Foil:
Greek Chicken Foil Packets
Fish Foil Packets with Pesto and Tomatoes
Salmon Foil Packets with Tomatoes and Olives
Autumn Tin Foil Dinners
Ingredients
Ingredients:
- 4 boneless, skinless chicken breasts
- 2 red or green bell peppers
- 2 small red onions
- 2 medium zucchini
- (You can vary the veggie amounts or ingredients to your own taste)
- Parmesan Cheese to sprinkle on when the foil packet dinners are done (completely optional, but good)
Marinade Ingredients:
- 1 1/2 cups Newman’s Own Classic Oil and Vinegar Dressing (or use your favorite no-sugar Italian dressing)
- 1 packet (dry mix) Zesty Italian Dressing Mix
- 1 T Spike seasoning (optional but highly recommended)
- Salt and fresh-ground black pepper to taste
Instructions
- Start by trimming the chicken breasts as needed, then cut them crosswise into pieces about one inch thick.
- Mix the Newman’s Own Olive Oil and Vinegar Dressing, Zesty Italian Dressing Mix, Spike Seasoning (if using) and a little salt and fresh-ground black pepper to make the marinade. (links are affiliate links)
- Put chicken in a Ziploc bag and add a little more than half the dressing mixture, saving the rest to use later on the veggies. Let the chicken marinate in the fridge or a cooler all day.
- A few hours before you want to cook, cut up the zucchini, red bell pepper, and red onion and put the veggies into a Ziploc bag. Pour in the rest of the marinade and let veggies marinate for 1-2 hours.
- When you’re ready to assemble the tin foil dinners, drain the chicken and vegetables. (If you’re camping you can just snip the corner of the Ziploc bag and let most of the liquid drain out. They don’t have to be completely drained, although it makes it easier to assemble the packets if the chicken and vegetables aren’t too wet.
- When you’re ready to cook the packets you need a grill that’s preheated to medium high, or a campfire or raised charcoal grill in a campground that has burned down to hot coals. (If cooking in the oven I’d preheat to 400F/200C.)
- To assemble the packets tear 8 large pieces of foil. (We had heavy-duty foil that was 18 inches wide and our pieces of foil turned out to be a little bigger than we absolutely needed.)
- Lay out the foil to make four packets with two pieces of foil for each. Put one-fourth of the chicken in the middle of each of the four pieces of foil, then put one-fourth the veggie mixture on top of the chicken. Fold over the foil, making a series of small folds at the top and at the ends to seal the edges together. Then turn that packet over and fold over the second piece of foil, sealing the ends well again. (This recipe has a better photo of how to fold the packets together.)
- For a home grill or a charcoal campground grill (where the packets are cooking on a grate) cook the packets about 10 minutes with the chicken side down on the grill; then turn and cook about 10 minutes more on the second side. I wish I knew a good way to tell when they’re done without opening one, but that’s really the only way!
- To cook near the hot coals of a fire, it’s extra important to have heavy-duty foil. I wouldn’t recommend putting packets directly on the coals, put them around the edge of the fire. I’m guessing cooking time will be slightly shorter for cooking near coals, but it will depend on how hot your coals are. I’d rotate the packets (so the opposite side is near the coals) every 5 minutes and then check one of the packets after 15 minutes to see if they need to cook a bit longer.
- I haven’t tried cooking these in the oven, but I’d try 400F/200C for 20-25 minutes and then checking one packet to see if the chicken is done.
- You can sprinkle the Foil Dinners with a little coarsely grated Parmesan cheese if desired!
Notes
I highly recommend the Newman’s Own Classic Oil and Vinegar Dressing (affiliate link) and Zesty Italian Dressing Mix (affiliate link) that I use to make this marinade, but if you don’t have those any similar dressing (that’s low in sugar) and Italian dressing seasoning can be substituted.
The Spike Seasoning (affiliate link) is definitely optional so don’t stress over it if you can’t find that or don’t want to buy it.
This recipe created by Kalyn sometime before 2005 and made for one of the Denny Family Campouts years and years ago.
Nutrition Information:
Yield:
4
Serving Size:
1
Amount Per Serving:
Calories: 261Total Fat: 6gSaturated Fat: 2gTrans Fat: 0gUnsaturated Fat: 3gCholesterol: 103mgSodium: 1438mgCarbohydrates: 11gFiber: 3gSugar: 6gProtein: 40g
Nutrition information is automatically calculated by the Recipe Plug-In I am using. I am not a nutritionist and cannot guarantee 100% accuracy, since many variables affect those calculations.
Did you make this recipe?
Did you make this recipe? Please leave a star rating (under the PRINT button in the recipe) or share a photo of your results on Instagram! THANKS!
Low-Carb Diet / Low-Glycemic Diet / South Beach Diet Suggestions:
With the ingredients used here this Low-Carb Foil Packet Dinner would be great for any low-carb, Keto, or low-glycemic diet plan, including any phase of the original South Beach Diet.
Find More Recipes Like This One:
Check out Foil Dinners for more easy recipes to cook outside. Use the Diet Type Index to find recipes suitable for a specific eating plan. You might also like to follow Kalyn’s Kitchen on Pinterest, on Facebook, on Instagram, or on YouTube to see all the good recipes I’m sharing there.
Historical Notes for this Recipe:
This recipe was first mentioned on the blog as a variation of Completely Foolproof 100% Delicious Grilled Chicken. In 2009 I made it separate recipe and the photos were updated in 2018. The recipe was last updated with more information in 2022.
Share This:
We are a participant in the Amazon Services LLC Associates Program, an affiliate advertising program designed to provide a means for us to earn fees by linking to Amazon.com and affiliated sites. As an Amazon Associate, I earn from qualifying purchases.
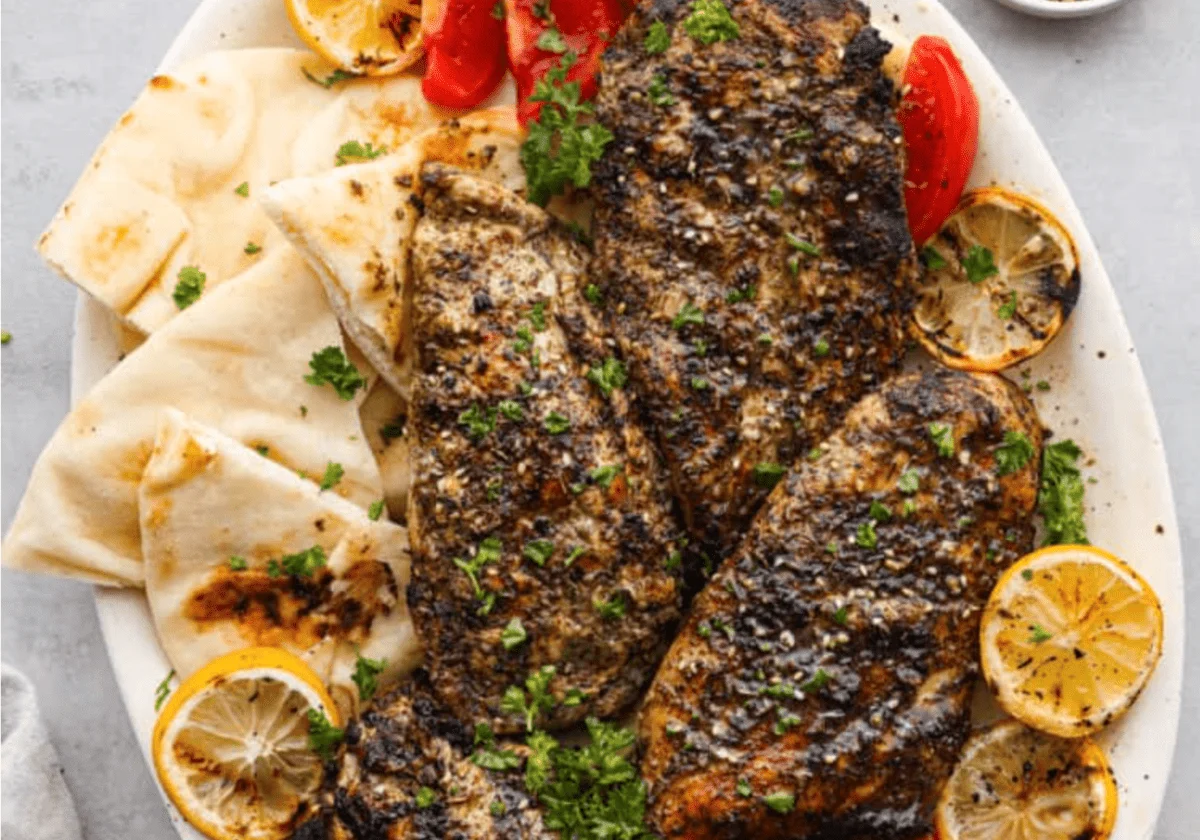
Za’atar Chicken
Seasoned with a traditional Middle Eastern Za’atar spice blend and grilled, this Za’atar chicken is juicy and packed with unique flavors. In just 20 minutes you’ll have a flavorful and filling dinner that no one will forget!
If you have never heard of Za’atar seasoning, you are not alone! I just heard of it recently, and now I’m hooked! It’s a great savory blend of warm and earthy seasonings that will really wow your taste buds. You can also make the spice at home! If you like homemade spices, you’ll have to try this Homemade Fajita Seasoning, this better than store bought Italian Seasoning, and this Taco Seasoning too!
Grilled Za’atar Chicken
So at this point you may be wondering what is Za’atar seasoning? It is a blend of savory, nutty, and earthy spices that usually includes oregano, thyme, marjoram, and sumac. There are different blends of Za’atar seasoning based on where you are eating it. Kind of like curry the ingredients can change based on the area it’s made in. I have a link to the Za’atar seasoning blend in the recipe box below too if you want to make it, or you can pick it up from the store.
Grilled Za’atar Chicken is quickly marinated in the Za’atar seasoning and olive oil and grilled to perfection. I really think you are going to love this dish! It’s an easy 20 minute dinner that would go great with some pita bread and hummus. I also love with baba ganoush which goes great with this Za’atar seasoning. You can actually sprinkle some on top and the flavor is incredible. I think this will be a new family favorite!
Ingredients
These simple ingredients combine to make the most delicious and moist chicken. This Za’atar chicken is so unique, and amazingly flavorful! If you are looking for a great easy dinner, then this is the recipe for you! See the recipe card below for exact measurements.
- Boneless Skinless Chicken Breasts: If you get a breast that is really thick, then you’ll want to flatten it out a bit so that it will all cook evenly on the grill.
- Olive Oil: Olive oil is a must for this recipe. It’s a great quality oil that helps the flavors in the seasonings really pop.
- Lemon Juice: Lemon juice is just what this recipe needs to bring out all of these gorgeous flavors!
- Za’atar Seasoning: I love making this blend at home! It is really herby and nutty, and perfect on meat. I add sesame seeds, coriander, and salt to my blend and I think it’s fantastic!
- Garlic: Minced garlic is one of my favorite things to eat on chicken. It’s so full of flavor and makes every bite the perfect one!
Za’atar Chicken Recipe
This recipe is so easy! I love how quickly it comes together and it really is so delicious. I ate it with some tomatoes and pita bread and it was perfection. Some of my kids added salt and pepper, but I thought it was perfect the way it was. You can make it however you like, and I know you are going to love it!

- Whisk: In a small bowl, whisk together the olive oil, lemon juice, za’atar seasoning, and garlic.
- Put in Bag: Place the chicken breasts in a resealable plastic bag then pour the mixture over the chicken.
- Refrigerate: Seal the bag and refrigerate for 30 minutes or up to overnight.
- Grill: Grill chicken breasts on medium-high heat for 7-8 minutes per side or until internal temperature reaches 165° Fahrenheit.
- Enjoy: Let the chicken rest before slicing and enjoying!
Tips for Grilling Chicken
Here are a few simple ways to make yourself the master of the grill! Once your friends and family get a bite of your grilled Za’atar chicken, they’ll be hooked. It’s hard not to be when they’re so juicy and flavorful.
- Use a Thermometer: This step is super important so that your chicken doesn’t dry out on the grill. Use a meat thermometer to check the temperature of your chicken. You can take them off the grill when the temperature inside reaches 165 degrees Fahrenheit. If you cook them any more than that, they may dry out.
- Let Rest: The key to juicy grilled Za’atar chicken is letting it rest for a minute or two after you pull it off the grill. This allows all of the tasty juices to reabsorb, giving you chicken breast that will melt in your mouth! If you cut into them too soon after grilling, those juices may be released instead of absorbing back into the meat.
- Dripping: If you have seasoning and oil dripping off of your chicken, it will make the flames touch the meat and that’s where the black burned part comes from. If you don’t want crispy crunchy parts on your chicken, make sure that your seasoning is all over your chicken, but not dripping off.
Storing Leftovers
Who doesn’t wan’t grilled Za’atar chicken for leftovers? This recipe makes enough to serve eight people, so if you need to save your leftovers here is how.
In the Refrigerator: Store your cooled chicken in an airtight container in the fridge for up to 4 days.
More Chicken Recipes
I love a simple chicken dinner! But sometimes chicken can taste boring when you are always making it the same way. Here are some recipes that will give you great ideas to keep your chicken tasting unique and juicy!
Join the Conversation (0)
Nutrition Facts
Amount per serving
- Calories N/A
- Total Fat N/A
- Saturated Fat N/A
- Cholesterol N/A
- Sodium N/A
- Total Carbohydrates N/A
- Protein N/A
Hi, I'm Alex!
I love sharing easy, healthy, and family-friendly recipes that anyone can make at home.

Be the first to comment on this recipe!