
Brown Sugar Garlic Flank Steak is made with the most amazing brown sugar garlic soy marinade. The steak is grilled to perfection and melt in your mouth delicious!
Marinated Flank Steak Recipe
I have a delicious flank steak recipe for you today and something that will also be life changing for you in the kitchen. You may never think about plastic wrap the same after you read this post….. seriously! Reynolds Kitchens is eliminating all of your plastic wrap headaches and have just launched their new Reynolds Kitchens Quick Cut Plastic Wrap with a built in slide cutter to help make plastic wrap usage frustration free!
Reynolds wrap is bringing you all of the new features that solve all of your plastic wrap troubles. A built in slide cutter, which makes dispensing super easy, a grip strip that keeps the roll in place, a starter edge so you can find the start of the roll and built in end tabs that keeps the roll securely in place.
We all need to use plastic wrap in the kitchen and it is such a love hate relationship. It doesn’t have to be that way anymore. Plastic wrap is now so easy to use and it helps to keep that long lasting tight seal to keep food fresh. This is perfect for meal prepping and storing your food!
I had such a fun opportunity this spring to go to Des Moines and New York and help demonstrate this amazing new product. There are so many different hacks and uses for this plastic wrap. One of my favorites was to use it to cover surfaces before working with raw meat. I use this hack every single time that I am using raw meat in the kitchen and need to protect the surface. This makes for great clean up as well. I used the hack for this recipe and then it was so great for wrapping it up and sealing in the marinade. Today, I am going to show you how to make this delicious flank steak and use this hack in the kitchen all of the time for yourself!
How do you make Brown Sugar Garlic Flank Steak?
- Prepare your marinade by mixing together the garlic, brown sugar, olive oil, Worcestershire, soy sauce, dijon, green onions and salt.
- On a clean surface lay out two large pieces of Reynolds Kitchens Quick Cut plastic wrap slide by side, with 2 inches overlapping. This creates and extra large rectangle.
- Pat steak dry using a paper towel and set in center of prepared plastic wrap surface. Pour marinade mixture over the steak and pull the sides of the plastic together until steak and marinade are tightly sealed. If needed use an extra piece of plastic wrap to seal up any loose ends. Set in refrigerated for 4 hours or up to overnight.
- Preheat grill to high heat and remove plastic and set prepared steak directly on grill. Allow to cook without turning for 3 minutes. Flip and cook other side for another 3 minutes. Continue flipping back and forth until steak reaches desired doneness. Allow to rest for 10 minutes before slicing.
What temperature do you cook flank steak on the grill?
Medium Rare takes about 6 minutes on the grill turning only once. It is 130-135 degrees on an instant read thermometer.
What is a good substitute for flank steak?
Skirt steak or flat iron steak is a good substitute. You can also use this marinade with your favorite cut of steak.
I especially love this hack because it seals in that marinade and keeps the flavor inside. You wrap up the meat tightly and as soon as it has had time to marinate, you simple throw the wrap away. This makes clean up a cinch.
Since school is back in session and we need dinner on the table quick, I love that flank steak only takes about 6 minutes on the grill. It is on the dinner table in no time and all. And everyone devoured it! My kids are steak levels and we sure love this recipe!
What side dishes can I serve with flank steak?
What other hacks can I do with plastic wrap?
- Use the plastic wrap to cover your surface and roll out dough.
- Cover your stand mixer with plastic wrap to keep the dough and flour within the bowl.
- Use it to prevent freezer burn. Cover the ice cream and then put the lid on top to create a seal.
- Put it over your iPad, iPhone or cook book to protect the surface while in the kitchen.
- Speed up the ripening process with avocados, or wrap the end of bananas in plastic wrap to slow down the rising process.
- Create piping bags with the plastic wrap and have multiple colors of frosting in your piping bag.
This post was sponsored by Reynolds Wrap. I love working with brands that I use in the kitchen for myself. All opinions expressed are my own!
Za’atar Chicken
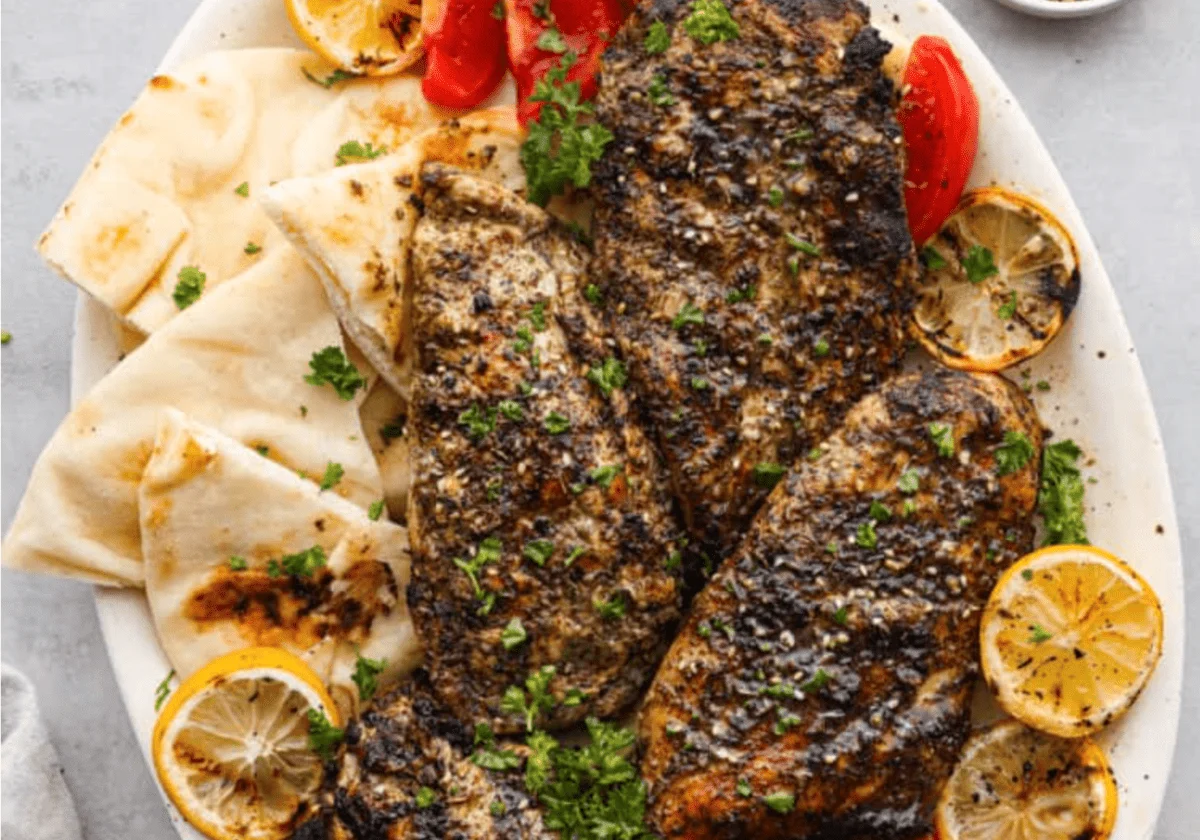
Seasoned with a traditional Middle Eastern Za’atar spice blend and grilled, this Za’atar chicken is juicy and packed with unique flavors. In just 20 minutes you’ll have a flavorful and filling dinner that no one will forget!
If you have never heard of Za’atar seasoning, you are not alone! I just heard of it recently, and now I’m hooked! It’s a great savory blend of warm and earthy seasonings that will really wow your taste buds. You can also make the spice at home! If you like homemade spices, you’ll have to try this Homemade Fajita Seasoning, this better than store bought Italian Seasoning, and this Taco Seasoning too!
Grilled Za’atar Chicken
So at this point you may be wondering what is Za’atar seasoning? It is a blend of savory, nutty, and earthy spices that usually includes oregano, thyme, marjoram, and sumac. There are different blends of Za’atar seasoning based on where you are eating it. Kind of like curry the ingredients can change based on the area it’s made in. I have a link to the Za’atar seasoning blend in the recipe box below too if you want to make it, or you can pick it up from the store.
Grilled Za’atar Chicken is quickly marinated in the Za’atar seasoning and olive oil and grilled to perfection. I really think you are going to love this dish! It’s an easy 20 minute dinner that would go great with some pita bread and hummus. I also love with baba ganoush which goes great with this Za’atar seasoning. You can actually sprinkle some on top and the flavor is incredible. I think this will be a new family favorite!
Ingredients
These simple ingredients combine to make the most delicious and moist chicken. This Za’atar chicken is so unique, and amazingly flavorful! If you are looking for a great easy dinner, then this is the recipe for you! See the recipe card below for exact measurements.
- Boneless Skinless Chicken Breasts: If you get a breast that is really thick, then you’ll want to flatten it out a bit so that it will all cook evenly on the grill.
- Olive Oil: Olive oil is a must for this recipe. It’s a great quality oil that helps the flavors in the seasonings really pop.
- Lemon Juice: Lemon juice is just what this recipe needs to bring out all of these gorgeous flavors!
- Za’atar Seasoning: I love making this blend at home! It is really herby and nutty, and perfect on meat. I add sesame seeds, coriander, and salt to my blend and I think it’s fantastic!
- Garlic: Minced garlic is one of my favorite things to eat on chicken. It’s so full of flavor and makes every bite the perfect one!
Za’atar Chicken Recipe
This recipe is so easy! I love how quickly it comes together and it really is so delicious. I ate it with some tomatoes and pita bread and it was perfection. Some of my kids added salt and pepper, but I thought it was perfect the way it was. You can make it however you like, and I know you are going to love it!

- Whisk: In a small bowl, whisk together the olive oil, lemon juice, za’atar seasoning, and garlic.
- Put in Bag: Place the chicken breasts in a resealable plastic bag then pour the mixture over the chicken.
- Refrigerate: Seal the bag and refrigerate for 30 minutes or up to overnight.
- Grill: Grill chicken breasts on medium-high heat for 7-8 minutes per side or until internal temperature reaches 165° Fahrenheit.
- Enjoy: Let the chicken rest before slicing and enjoying!
Tips for Grilling Chicken
Here are a few simple ways to make yourself the master of the grill! Once your friends and family get a bite of your grilled Za’atar chicken, they’ll be hooked. It’s hard not to be when they’re so juicy and flavorful.
- Use a Thermometer: This step is super important so that your chicken doesn’t dry out on the grill. Use a meat thermometer to check the temperature of your chicken. You can take them off the grill when the temperature inside reaches 165 degrees Fahrenheit. If you cook them any more than that, they may dry out.
- Let Rest: The key to juicy grilled Za’atar chicken is letting it rest for a minute or two after you pull it off the grill. This allows all of the tasty juices to reabsorb, giving you chicken breast that will melt in your mouth! If you cut into them too soon after grilling, those juices may be released instead of absorbing back into the meat.
- Dripping: If you have seasoning and oil dripping off of your chicken, it will make the flames touch the meat and that’s where the black burned part comes from. If you don’t want crispy crunchy parts on your chicken, make sure that your seasoning is all over your chicken, but not dripping off.
Storing Leftovers
Who doesn’t wan’t grilled Za’atar chicken for leftovers? This recipe makes enough to serve eight people, so if you need to save your leftovers here is how.
In the Refrigerator: Store your cooled chicken in an airtight container in the fridge for up to 4 days.
More Chicken Recipes
I love a simple chicken dinner! But sometimes chicken can taste boring when you are always making it the same way. Here are some recipes that will give you great ideas to keep your chicken tasting unique and juicy!
Join the Conversation (0)
Nutrition Facts
Amount per serving
- Calories N/A
- Total Fat N/A
- Saturated Fat N/A
- Cholesterol N/A
- Sodium N/A
- Total Carbohydrates N/A
- Protein N/A
Hi, I'm Alex!
I love sharing easy, healthy, and family-friendly recipes that anyone can make at home.


Be the first to comment on this recipe!